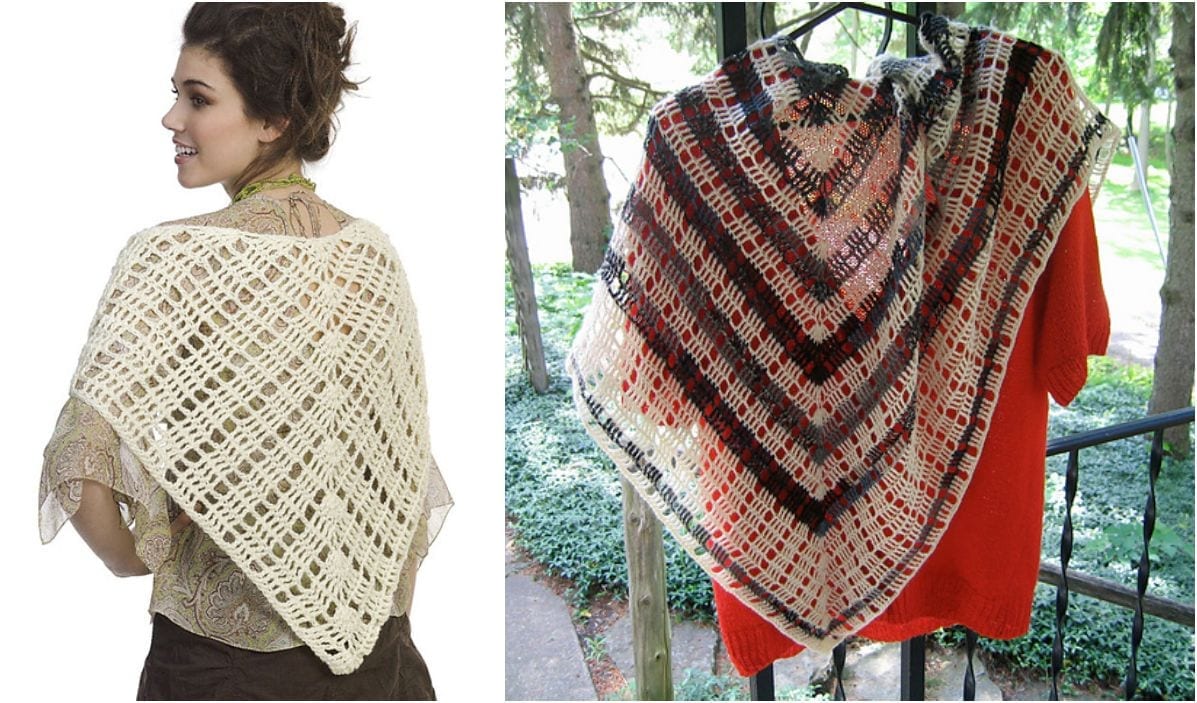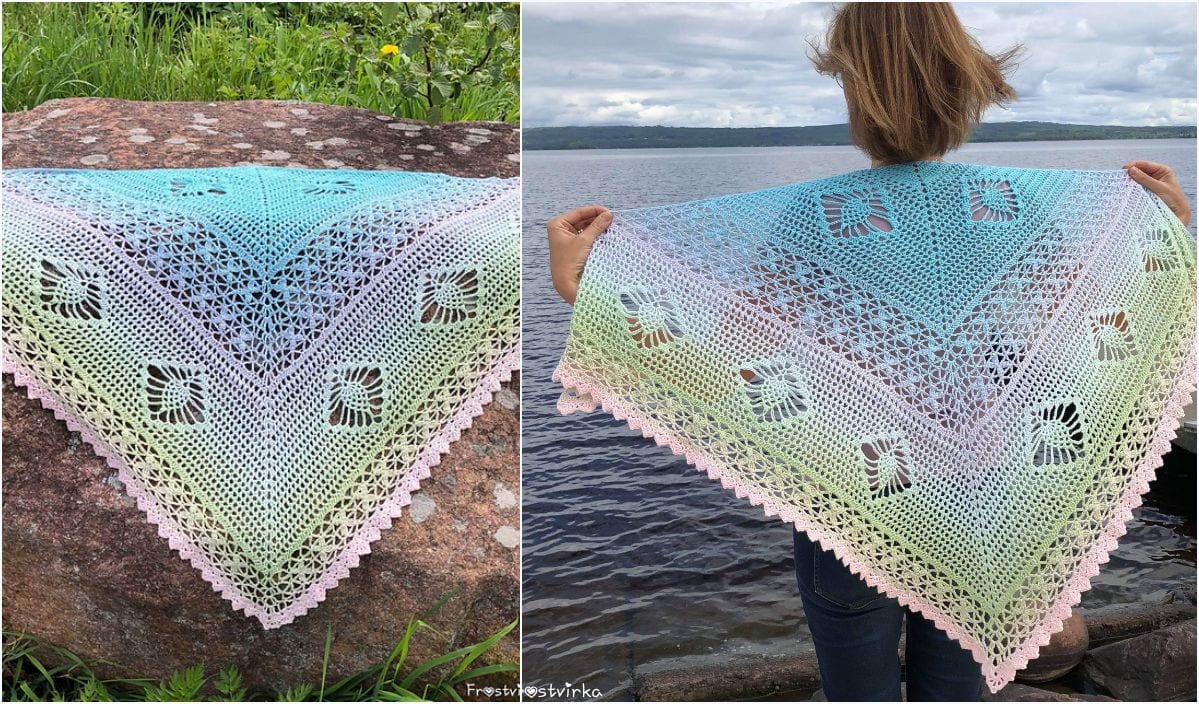
Sunset Orchid Shawl
Materials Needed
Yarn: Light DK / Sport weight (#2 Fine) yarn. Approximately 100% cotton or a cotton-bamboo blend is recommended for drape and stitch definition.
- Size S (Bust 32-34"): 850-950 yards (approx. 4-4.5 skeins of 230yd/100g)
- Size M (Bust 36-38"): 1000-1100 yards (approx. 5 skeins)
- Size L (Bust 40-42"): 1200-1300 yards (approx. 5.5-6 skeins)
Hook: 4.0 mm (G) crochet hook, or size needed to obtain gauge. A 3.5 mm hook for edging (optional).
Notions: Yarn needle, stitch markers (4), measuring tape, blocking pins and mats.
Gauge
Main Pattern Stitch (after blocking): 4 inches = 18 sts x 10 rows in pattern (see stitch guide below).
Mesh Section (after blocking): 4 inches = 14 sts x 8 rows of (dc, ch 1) mesh.
To make a gauge swatch: Chain 22. Work rows 1-4 of the "Body Mesh Section" pattern. Measure the center 4 inches. Adjust hook size if necessary.
Abbreviations (US Terms)
- ch: chain
- sl st: slip stitch
- sc: single crochet
- dc: double crochet
- tr: treble crochet (yarn over twice)
- sk: skip
- sp: space
- st(s): stitch(es)
- RS: right side
- WS: wrong side
- rep: repeat
- inc: increase (work 2 sts into same st)
- dec: decrease (crochet 2 sts together)
- V-st: (dc, ch 1, dc) in same st
Pattern Instructions
Special Stitches
Beginning V-st (beg V-st): ch 4 (counts as dc + ch 1), dc in same st.
Shell (sh): (2 dc, ch 1, 2 dc) in indicated st or sp.
Picot (optional edging): ch 3, sl st in 3rd ch from hook.
Construction Notes
This top is worked flat in two identical panels (Front and Back) from the bottom hem upwards. The sides are seamed, leaving armholes. The neckline is shaped with decreases. The design features a central lace panel flanked by solid mesh sections. Sizing is adjusted by the number of initial chains and the depth of the armhole.
Panel (Make 2 identical)
Foundation Row (RS): Ch 89 (97, 105).
Row 1 (WS): Sc in 2nd ch from hook and in each ch across. Turn. (88, 96, 104 sc)
Row 2 (RS): Ch 1, sc in first 8 sts, ch 1, *sk next st, dc in next st, ch 1, sk next st; rep from * until 8 sts remain, sc in last 8 sts. Turn.
Row 3 (WS): Ch 1, sc in first 8 sts, *ch 1, dc in next dc; rep from * across, ending with ch 1, sc in last 8 sts. Turn.
Row 4: Repeat Row 2.
This establishes the side mesh panels (8 sc borders + repeating dc/ch-1 mesh). Continue the mesh sections as established for the next 4 rows, then begin the center lace pattern.
Center Lace Insertion (Start on Row 8)
Row 8 (RS): Work 8 sc, mesh pattern over next 20 (24, 28) sts, place marker. Work center lace over next 32 (32, 32) sts as follows: V-st in next st, sk 2 sts, sh in next st, sk 2 sts, V-st in next st, sk 2 sts, sh in next st, sk 2 sts, V-st in next st, sk 2 sts, sh in next st, sk 2 sts, V-st in next st. Place marker. Work mesh pattern over last 20 (24, 28) sts, end with 8 sc. Turn.
Row 9 (WS): Ch 1, sc in first 8 sts, mesh pattern to marker, *ch 1, (dc, ch 1, dc) in ch-1 sp of V-st, ch 1, sc in ch-1 sp of shell; rep from * across center, ending with (dc, ch 1, dc) in last V-st, ch 1, mesh to last 8 sts, sc in last 8. Turn.
Row 10 (RS): Ch 1, sc in first 8 sts, mesh to marker, *V-st in next dc (the center of the V-st from previous row), sk 2 ch-1 sps, sh in next sc (the sc between shells), sk 2 ch-1 sps; rep from * across, ending with V-st in last dc, mesh to end, sc in last 8. Turn.
Row 11 (WS): Repeat Row 9.
Row 12 (RS): Ch 1, sc in first 8 sts, mesh to marker, *sh in next sc (the sc between V-sts), sk 2 ch-1 sps, V-st in next dc (center of V-st), sk 2 ch-1 sps; rep from * across, ending with sh in last sc, mesh to end, sc in last 8. Turn.
Row 13 (WS): Ch 1, sc in first 8 sts, mesh to marker, *ch 1, sc in ch-1 sp of shell, ch 1, (dc, ch 1, dc) in ch-1 sp of V-st; rep from * across, ending with sc in last shell sp, ch 1, mesh to end, sc in last 8. Turn.
Row 14 (RS): Repeat Row 10.
Continue working Rows 9-14 for the center lace pattern until the panel measures approximately 12 (13, 14) inches from the foundation chain, ending after a WS row. Do not fasten off.
Armhole and Neckline Shaping
Left Shoulder Setup (RS): Sl st across first 10 (12, 14) sts (8 sc + 2 mesh sts). Ch 1, sc in same st, work mesh pattern across next 12 (14, 16) sts, then continue center lace pattern over 32 sts, then mesh over next 12 (14, 16) sts. Leave remaining 10 (12, 14) sts unworked for right armhole. Turn. (68, 72, 76 sts)
Right Shoulder Setup (will be mirrored on second panel): On the second panel, work the sl sts at the beginning of the RS row for the left armhole, leaving the other end unworked.
Neckline Decreases (Left Side of Neck - Front Panel)
Work decreases at the neck edge (center of panel) on every RS row.
Row 1 (WS): Work even in pattern across all sts. Turn.
Row 2 (RS - Decrease Row): Work to 2 sts before center lace pattern, sc2tog (or dc2tog if in mesh) to decrease 1 st at neck edge. Continue pattern across center, then work even to end. Turn.
Row 3 (WS): Work even.
Row 4 (RS - Decrease Row): Repeat Row 2.
Repeat these 4 rows until 18 (20, 22) sts remain for the shoulder. Then work even without decreases until the armhole measures 7 (8, 9) inches from the underarm sl st row. Fasten off.
Back Panel Neckline
Work the Back panel identically to the Front, but for the neckline, work decreases only 4 times total (instead of continuing to 18 sts). After the 4 decreases, work even until the armhole is the same length as the Front. This creates a deeper front neckline and a higher back neckline. Fasten off.
Finishing
Seaming
- Shoulder Seams: Place Front and Back panels with RS facing each other. Using a yarn needle and mattress stitch, or by slip stitching through the back loops only, seam the top 18 (20, 22) sts of each shoulder together.
- Side Seams: Fold the piece so the wrong sides are together. Starting at the bottom hem, seam up the side using mattress stitch or a continuous slip stitch seam. Stop seaming 7 (8, 9) inches below the shoulder seam to create the armhole opening. Repeat for the other side.
Neckline and Armhole Edging
Round 1: With RS facing, attach yarn at a shoulder seam. Ch 1, work 1 round of sc evenly around the entire neckline. For the armholes, work 1 round of sc evenly around the opening. Join with sl st to first sc.
Round 2 (Picot Edge - Optional): *Sc in next st, picot (ch 3, sl st in 3rd ch from hook), sk 1 st; rep from * around. Join and fasten off. Alternatively, for a simpler edge, work a round of reverse sc (crab stitch).
Bottom Hem
Try on the top. If desired, add a 2-inch band of single crochet in the back loops only (for a ribbed effect) to the bottom edge. Or, simply weave in all ends.
Blocking
Soak the finished top in lukewarm water with a drop of mild soap for 15 minutes. Gently squeeze out excess water (do not wring). Roll in a towel to remove moisture. Lay flat on blocking mats. Pin the lace panels open to shape, ensuring the mesh sections are evenly stretched. Allow to dry completely (24-48 hours). Blocking is essential for the lace to open up and for proper drape.
Tips
- Gauge is Critical: This top relies on a specific fabric density for the lace to drape correctly. Always make a gauge swatch and block it before starting. If your swatch is too stiff, go up a hook size; if too floppy, go down a hook size.
- Use Stitch Markers Religiously: Place a marker on the first and last stitch of the center lace panel. This will prevent you from accidentally adding or losing stitches in the mesh borders, which is the most common mistake in this pattern.
- Customize the Length: The pattern gives a standard hip-length top. For a cropped version, work 4 fewer pattern repeats before the armhole shaping. For a tunic-length top, add 4-6 more repeats. Adjust yarn yardage accordingly.