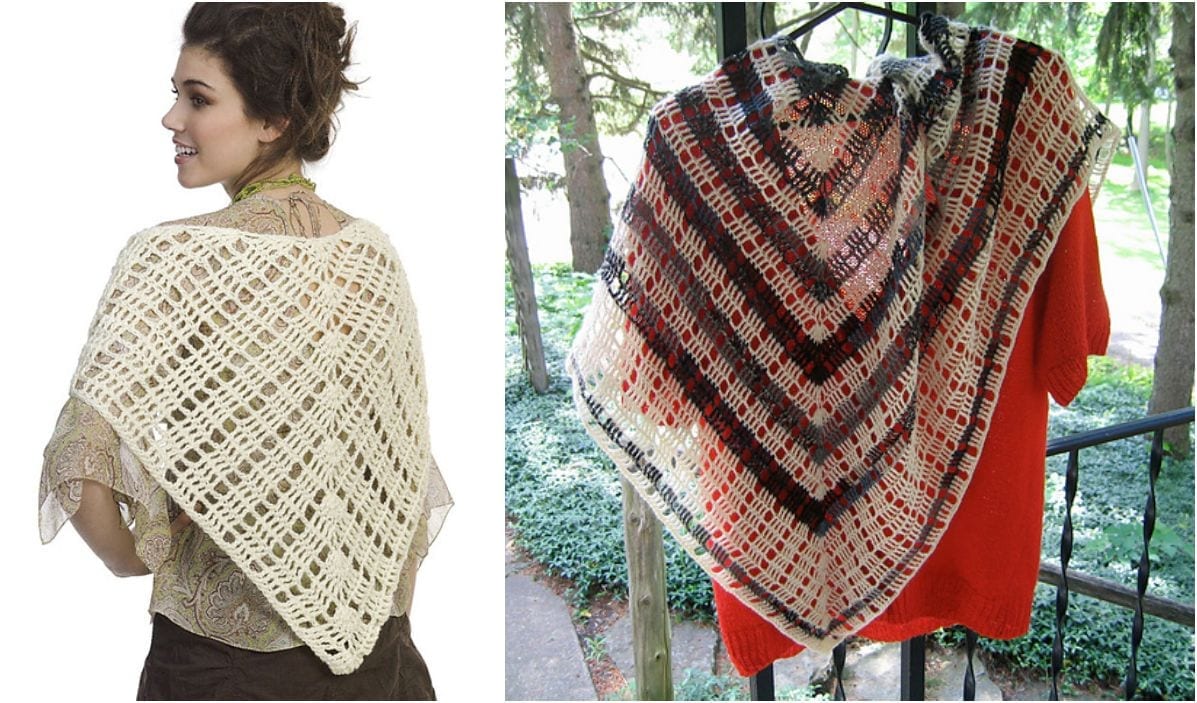
Amita Shawl
Materials Needed
- Yarn: DK weight (#3 Light) cotton, linen, or cotton-blend yarn. Yardage estimates:
- Size S (bust 32-34”): 650-700 yards
- Size M (bust 36-38”): 750-800 yards
- Size L (bust 40-42”): 850-900 yards
Note: If extending the length of the top, add 50-75 yards per size. - Hook: US Size E/4 (3.5 mm) or size needed to obtain gauge
- Notions: Yarn needle, stitch markers (4), measuring tape, scissors
Gauge
4” x 4” = 14 stitches x 10 rows in double crochet (dc) after blocking. Gauge is critical for fit – always make a swatch and block it before beginning.
Abbreviations (US Terms)
- ch – chain
- sl st – slip stitch
- sc – single crochet
- dc – double crochet
- tr – treble crochet (yo twice, pull through, yo, pull through 2, yo, pull through 2)
- st(s) – stitch(es)
- sk – skip
- sp – space
- ch-sp – chain-space (the space created by a chain)
- rep – repeat
- RS – right side
- WS – wrong side
- FSC – foundation single crochet
Pattern Instructions
Important Construction Notes
This top is worked from the top down in one piece, starting with the back yoke, then the front yoke, and joining at the shoulders. The body is then worked in the round with a lace panel. Sleeves are added last. The design features a V-neckline and a slightly cropped, A-line silhouette. All sizes are worked the same way; stitch counts for S/M/L are given in parentheses: S (M, L).
Back Yoke
Row 1 (RS): FSC 62 (66, 70). Turn. (62, 66, 70 sts)
Row 2 (WS): Ch 1 (does not count as a st), sc in first st, *ch 3, sk 2 sts, sc in next st; rep from * across. Turn. (20, 21, 22 ch-3 loops + 1 sc at each end)
Row 3 (RS): Ch 3 (counts as first dc), 2 dc in first sc, *3 dc in next sc; rep from * across to last sc, 3 dc in last sc. Turn. (62, 66, 70 dc)
Row 4 (WS): Ch 1, sc in first st, *ch 3, sk 2 sts, sc in next st; rep from * across. Turn.
Row 5 (RS): Ch 3, 2 dc in first sc, *3 dc in next sc; rep from * across, 3 dc in last sc. Turn.
Rows 6-9 (RS/WS): Repeat Rows 4-5 two more times. On the final RS row, you will have 62 (66, 70) dc. Fasten off. Back yoke measures approximately 5” from foundation row.
Front Yoke (Left Side)
Row 1 (RS): With RS facing, attach yarn to the left side of the back yoke’s foundation row (the beginning of the FSC). Ch 1, sc in same st, ch 3, sk 2 sts, sc in next st; rep from * across for 25 (27, 29) sts (i.e., 8, 9, 9 ch-3 loops). You will have 25 (27, 29) sc+ch-3 loops worked. Leave remaining sts unworked for the V-neck opening. Turn. (8, 9, 9 ch-3 loops)
Row 2 (WS): Ch 3, 2 dc in first sc, *3 dc in next sc; rep from * across, 3 dc in last sc. Turn. (25, 27, 29 dc)
Row 3 (RS): Ch 1, sc in first st, *ch 3, sk 2 sts, sc in next st; rep from * across. Turn.
Row 4 (WS): Ch 3, 2 dc in first sc, *3 dc in next sc; rep from * across, 3 dc in last sc. Turn.
Rows 5-8: Repeat Rows 3-4 two more times. Fasten off. (8 rows total for left front yoke)
Front Yoke (Right Side)
Row 1 (RS): With RS facing, attach yarn to the st that is 25 (27, 29) sts from the right edge of the back yoke foundation (i.e., skip the center 12 sts for the V-neck). Ch 1, sc in same st, ch 3, sk 2 sts, sc in next st; rep from * across to the end. Turn. (8, 9, 9 ch-3 loops)
Rows 2-8: Work exactly as for Left Front Yoke (Rows 2-8). Fasten off. Right front yoke now mirrors left.
Join Shoulders & Create Neckline
Step 1: With WS together, place back yoke and front yokes (both sides) together. Using a yarn needle and a length of yarn, whip stitch the top edges together at the shoulders: join the first 8 sts of the back yoke to the top 8 sts of each front yoke. Leave the center sts open for the neckline. Weave in ends.
Step 2: Try on the yoke to check the V-neck depth. If desired, you can adjust by adding or removing rows on the front yokes. The neckline should sit just below the collarbone. For a deeper V, work 1-2 additional rows on both front yokes before joining.
Body (Worked in the Round)
Round 1 (RS): With RS facing, attach yarn at the underarm edge of the right front yoke (where the shoulder seam ends). Ch 3 (counts as dc), work 1 dc in each st across the back yoke (62, 66, 70 sts), then work 1 dc in each st across the left front yoke (25, 27, 29 sts), then across the right front yoke (25, 27, 29 sts). Do not join in the round yet – you will have a flat piece. Turn. (112, 120, 128 dc)
Round 2 (WS): Ch 1, sc in first st, *ch 3, sk 2 sts, sc in next st; rep from * across. Turn.
Round 3 (RS): Ch 3, 2 dc in first sc, *3 dc in next sc; rep from * across, 3 dc in last sc. Turn.
Round 4 (WS): Ch 1, sc in first st, *ch 3, sk 2 sts, sc in next st; rep from * across. Turn.
Rounds 5-12: Repeat Rounds 3-4 four more times (total of 12 rounds from underarm). After Round 12, you should have 112 (120, 128) dc on the RS rows. The body should measure approximately 5” from underarm.
Lace Panel Insertion (Optional, but recommended for A-line shape)
Round 13 (RS): Ch 3, dc in next st, *ch 2, sk 1 st, dc in next 2 sts; rep from * across. Turn. (56, 60, 64 dc pairs + ch-2 spaces)
Round 14 (WS): Ch 1, sc in first dc, *ch 4, sk (ch-2 sp + 2 dc), sc in next dc; rep from * across. Turn. (28, 30, 32 ch-4 loops)
Round 15 (RS): Ch 3, 3 dc in first ch-4 loop, *ch 2, 3 dc in next ch-4 loop; rep from * across. Turn. (28, 30, 32 dc clusters)
Round 16 (WS): Ch 1, sc in first dc, *ch 5, sc in next dc (center of next cluster); rep from * across. Turn. (28, 30, 32 ch-5 loops)
Round 17 (RS): Ch 3, 4 dc in first ch-5 loop, *ch 2, 4 dc in next ch-5 loop; rep from * across. Turn. (28, 30, 32 dc clusters of 4)
Round 18 (WS): Ch 1, sc in first dc, *ch 6, sc in next dc (center of next cluster); rep from * across. Turn. (28, 30, 32 ch-6 loops)
Round 19 (RS): Ch 3, 5 dc in first ch-6 loop, *ch 2, 5 dc in next ch-6 loop; rep from * across. Turn. (28, 30, 32 dc clusters of 5)
Round 20 (WS): Ch 1, sc in first dc, *ch 7, sc in next dc (center of next cluster); rep from * across. Fasten off.
Bottom Edge Finishing
With RS facing, attach yarn at any bottom edge stitch. Work 1 round of single crochet evenly around the entire bottom hem. For the scalloped edge: *sc in next st, sk 1 st, 5 dc in next st, sk 1 st; rep from * around. Join with sl st to first sc. Fasten off.
Sleeves (Make 2)
Step 1: With RS facing, attach yarn at the underarm seam of the body. Work 1 sc in each st around the armhole opening. Count stitches and note the number – it should be approx 48 (52, 56) sts. Join with sl st.
Round 1: Ch 1, sc in same st, *ch 3, sk 2 sts, sc in next st; rep from * around. Join with sl st to first sc. (16, 17, 18 ch-3 loops)
Round 2: Ch 3, 2 dc in first sc, *3 dc in next sc; rep from * around. Join with sl st to top of ch-3. (48, 51, 54 dc)
Round 3: Ch 1, sc in same st, *ch 3, sk 2 sts, sc in next st; rep from * around. Join.
Round 4: Ch 3, 2 dc in first sc, *3 dc in next sc; rep from * around. Join.
Rounds 5-6: Repeat Round 3-4. Fasten off.
Sleeve cuff: Work 1 round of sc evenly around the sleeve opening, then 1 round of reverse sc (crab stitch) for a neat edge. Fasten off and weave in ends.
Finishing
- Weave in all ends using a yarn needle. Be sure to weave ends into the back of the work, following the path of the stitches for at least 2 inches.
- Block the top: Soak in lukewarm water with a drop of mild soap for 20 minutes. Gently squeeze out excess water (do not wring). Lay flat on a blocking mat, shaping to the correct measurements. Use pins to open up the lace panels and define the V-neck. Allow to dry completely.
- Neckline trim (optional): If you prefer a more finished neckline, work 1 round of single crochet around the entire neck opening (V-neck + back), then 1 round of reverse sc. This will also help stabilize the V shape.
Tips
- Check your gauge twice. This top relies on a precise stitch count for the yoke to fit properly. If your gauge is off, adjust your hook size accordingly – a tighter gauge makes a smaller top, a looser gauge makes a larger one.
- Use stitch markers at the V-neck edges. When working the front yokes, place a stitch marker at the center stitch of the back yoke to help you align the V-neck opening evenly. This ensures the left and right front pieces are symmetrical.
- Customize the length easily. The lace panel (Rounds 13-20) can be repeated to make a longer top, or omitted entirely for a cropped version. Simply add or remove the lace rows, and finish with the bottom scallop edge. For a dress, repeat the lace panel 3-4 times, adding 10-15 rounds of the basic body pattern between repeats.