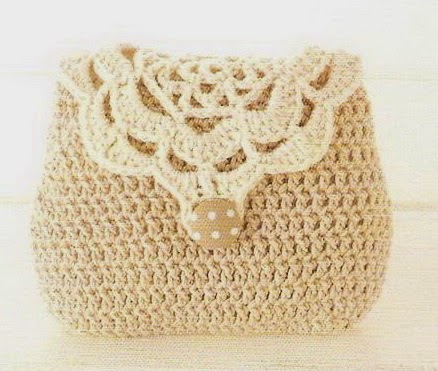
Two Toned Coin Purse Crochet
Materials Needed
- Yarn: Approximately 250-300 yards of worsted weight (#4 medium) cotton or cotton-blend yarn. This pattern uses two colors: Color A (Main Color, approx. 180 yds) and Color B (Contrast Color, approx. 90 yds). Suggested: Lily Sugar'n Cream or Lion Brand 24/7 Cotton.
- Crochet Hook: Size H/8 (5.0 mm) or size needed to obtain gauge.
- Notions: Tapestry needle for weaving ends, stitch markers (2), scissors, 1-inch button for closure (optional), sewing needle and thread for button.
- Lining fabric (optional): ½ yard of lightweight fabric if you choose to line the bag.
Gauge
4 inches = 14 stitches x 10 rows in half double crochet (hdc) with a 5.0 mm hook, worked flat. Always check your gauge before starting. If your swatch is too small, go up a hook size; if too large, go down.
Abbreviations (US Terms)
- ch – chain
- sl st – slip stitch
- sc – single crochet
- hdc – half double crochet
- dc – double crochet
- BLO – back loop only
- st(s) – stitch(es)
- sk – skip
- rep – repeat
- RS – right side
- WS – wrong side
- pm – place marker
Pattern Instructions
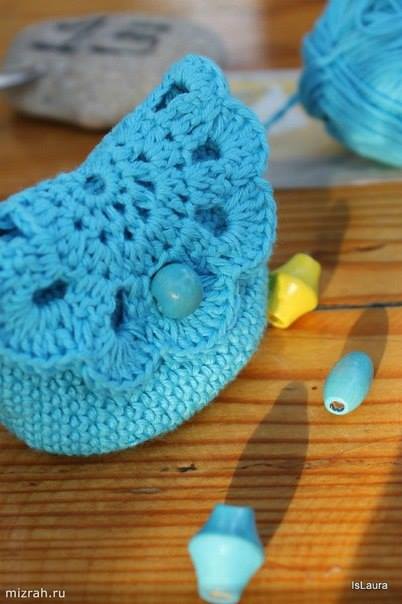
Finished Dimensions: Approximately 8 inches wide, 6 inches tall, and 2.5 inches deep (after seaming and slight blocking). This is a small crossbody or clutch style bag.
Bag Body (worked flat, bottom-up)
Note: The bag is made in one piece that folds to form the front, back, and bottom. The flap is worked separately and sewn on.
Row 1 (RS): With Color A, ch 29. Hdc in the 3rd ch from hook (the skipped 2 ch count as the first hdc). Hdc in each ch across. Turn. (28 hdc)
Row 2-30: Ch 2 (counts as first hdc here and throughout), hdc in each st across. Turn. (28 hdc)
Row 31 (Bottom fold line): Ch 2, hdc in BLO of each st across. Turn. (28 hdc)
Row 32-60: Ch 2, hdc in each st across. Turn. (28 hdc)
Row 61: Ch 2, hdc in each st across. Fasten off Color A. (28 hdc)
Your piece should now be a rectangle measuring approximately 8 inches wide and 12 inches tall. The BLO row (Row 31) is the bottom fold. Rows 1-30 form the front panel, and rows 32-60 form the back panel.
Side & Bottom Seaming
Fold the rectangle in half with RS together, matching Row 1 to Row 61. The BLO row is at the fold. Using Color A and a tapestry needle (or crochet hook for a sl st seam), sew or crochet the side seams closed.
- Left side: Working through both layers, sl st or whipstitch from the bottom fold (Row 31) up to Row 1 (front) and Row 61 (back). This creates the side seam for the front and back panels. Leave the top 5 rows (Rows 56-60 on back, and corresponding rows on front) unseamed – this is the bag opening.
- Right side: Repeat for the right side, from bottom fold up to the top. Leave the same top 5 rows unseamed.
- Bottom: The bottom is already formed by the fold. To reinforce, you may stitch along the bottom edge through both layers, or leave as is.
Turn the bag right side out. You should have a neat pouch with an open top.
Flap (worked flat)
The flap is made separately and will be attached to the back panel.
Row 1 (RS): With Color B, ch 30. Hdc in the 3rd ch from hook. Hdc in each ch across. Turn. (29 hdc)
Row 2-8: Ch 2, hdc in each st across. Turn. (29 hdc)
Row 9 (Decrease row): Ch 2, hdc2tog (hdc decrease: yarn over, insert hook into next st, pull up loop, yarn over, insert into next st, pull up loop, yarn over and pull through all 5 loops on hook), hdc in next 25 sts, hdc2tog. Turn. (27 hdc)
Row 10-11: Ch 2, hdc in each st across. Turn. (27 hdc)
Row 12: Ch 2, hdc2tog, hdc in next 23 sts, hdc2tog. Turn. (25 hdc)
Row 13-14: Ch 2, hdc in each st across. Turn. (25 hdc)
Row 15: Ch 2, hdc2tog, hdc in next 21 sts, hdc2tog. Turn. (23 hdc)
Row 16-17: Ch 2, hdc in each st across. Turn. (23 hdc)
Row 18: Ch 2, hdc2tog, hdc in next 19 sts, hdc2tog. Turn. (21 hdc)
Row 19: Ch 2, hdc in each st across. Turn. (21 hdc)
Row 20: Ch 2, hdc2tog, hdc in next 17 sts, hdc2tog. Turn. (19 hdc)
Row 21: Ch 2, hdc in each st across. Turn. (19 hdc)
Row 22: Ch 2, hdc2tog, hdc in next 15 sts, hdc2tog. Turn. (17 hdc)
Row 23: Ch 2, hdc in each st across. Turn. (17 hdc)
Row 24: Ch 2, hdc2tog, hdc in next 13 sts, hdc2tog. Turn. (15 hdc)
Row 25: Ch 2, hdc in each st across. Do not fasten off. (15 hdc)
Flap Edging
With the same yarn (Color B), ch 1 and do not turn. Sc evenly around the entire flap, working 1 sc per row along the sides, and 1 sc per hdc along the top and bottom edges. At the bottom corners, work 2 sc in each corner to keep the edging flat. When you reach the starting point, sl st to the first sc. Fasten off, leaving a long tail for sewing.
Attaching the Flap
Position the flap on the back panel of the bag. The straight edge of the flap (the first row you made) should align with the top edge of the back panel, centered (the flap is slightly narrower than the bag body). Pin in place. Using the long tail and a tapestry needle, whipstitch the flap securely to the back panel, working through the sc edging of the flap and the hdc stitches of the bag body. Weave in ends.
Strap
Option 1: Short Crossbody Strap (approx. 40 inches)
With Color A, ch 6. Sc in the 2nd ch from hook and in each ch across. Turn. (5 sc)
Row 2-200: Ch 1, sc in BLO of each st across. Turn. (5 sc)
Fasten off, leaving a long tail. This creates a sturdy, non-stretchy strap. Sew the ends securely to the inside of the bag at the side seams, about 1 inch down from the top opening. Reinforce with an extra knot.
Option 2: Simple Chain Strap
With Color A, ch 150 (or desired length). Sl st in the 2nd ch from hook and in each ch across. Fasten off. Attach as above.
Button Loop & Button (Optional)
Button Loop: With Color B, attach yarn at the center top of the front panel (inside the bag opening, on the front edge). Ch 8, sl st back into the same spot to form a loop. Fasten off and weave ends. Sew a 1-inch button onto the flap, centered and about 1 inch from the tip. The loop should fit snugly over the button.
Finishing
- Weave in all ends: Use a tapestry needle to weave in any remaining yarn tails on the inside of the bag, trimming close to the fabric.
- Blocking (optional but recommended): Lightly mist the bag with water and shape it on a flat surface. Use pins to square up the sides, bottom, and flap. Allow to dry completely. This helps the stitches settle and gives a professional finish.
- Lining (optional): If you want a sturdier bag, cut a piece of fabric to the shape of the bag (front, back, bottom, and sides) plus ½-inch seam allowance. Sew the fabric into a pouch, insert into the crocheted bag, fold the top edge of the fabric inward, and hand-stitch it to the inside of the bag just below the top edge. This hides the yarn ends and prevents items from poking through.
Tips
- Stitch Tension: For a structured bag that holds its shape, maintain a consistent, slightly tighter tension than you would for a scarf or blanket. If your hdc stitches are loose, consider going down a half hook size (e.g., 4.5 mm).
- Color Changes: If you want to add stripes or a color block design, change colors at the end of a row. Simply drop the old color, pick up the new color, and ch 2 with the new color to start the next row. Weave in ends as you go to save time.
- Strap Length Customization: Try on the strap before fastening off to ensure the length works for your body. A good rule of thumb for a crossbody bag is that the bottom of the bag should rest at your hip bone when standing. Add or remove rows accordingly (each row adds about ½ inch in length).