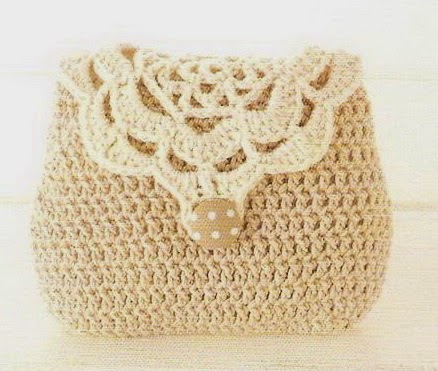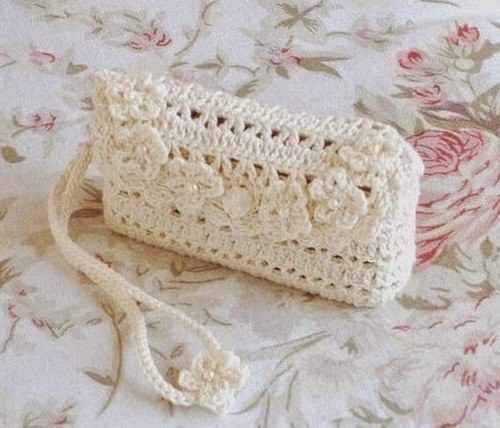
Pretty Crochet Purse
Materials Needed
- Yarn: Approximately 250-300 yards of worsted weight (Category 4) cotton or cotton-blend yarn. A smooth, non-splitting yarn like a mercerized cotton is ideal for stitch definition. Shown in: 2 skeins of Lily Sugar‘n Cream in "Ecru" (95g/3oz, 180 yds per skein). You will need approximately 1.5 skeins for the main body and handles.
- Crochet Hook: Size H/8 (5.0 mm), or size needed to obtain gauge.
- Notions: Yarn needle for weaving ends, stitch markers (optional, but helpful for counting rounds and marking the beginning of a spiral), scissors, 1 inch (25 mm) magnetic snap closure (optional, for a secure closure), fabric glue or needle and thread (if using the magnetic snap).
Gauge
In pattern (Half Double Crochet in the Back Loop Only): 14 stitches x 10 rows = 4 inches (10 cm).
Always take time to check your gauge. If your stitches are too tight, try a larger hook. If they are too loose, try a smaller hook. The bag’s structure depends on a firm, even fabric.
Abbreviations (US Terms)
- ch – chain
- sl st – slip stitch
- sc – single crochet
- hdc – half double crochet
- hdc-blo – half double crochet in the back loop only
- dc – double crochet
- inc – increase (work 2 hdc-blo in the same stitch)
- dec – decrease (hdc2tog-blo: half double crochet two stitches together worked in the back loops only)
- st(s) – stitch(es)
- rnd – round
- rep – repeat
- rem – remaining
- RS – right side
- WS – wrong side
Pattern Instructions
Design Notes
This bag is worked from the bottom up in continuous spirals (do not join with a slip stitch at the end of each round unless instructed). Use a stitch marker in the first stitch of each round to keep track of your progress. The body uses the hdc-blo stitch. This creates a beautiful, subtle ribbed texture that is both sturdy and stretchy. The handles are worked separately and then sewn onto the bag.
Part 1: The Bottom (Worked in a flat oval)
Foundation: Ch 14.
Rnd 1 (RS): Work 3 hdc in the 2nd ch from the hook (this forms the first curve). Hdc in the next 11 ch. Work 3 hdc in the last ch (this forms the second curve). Do not turn. Working along the opposite side of the foundation chain: Hdc in the next 11 ch (the loops you didn’t use). Join with a sl st to the first hdc of the round. (28 sts)
Rnd 2: Ch 1 (does not count as a st). Hdc in the same st as ch 1. Inc in the next 2 sts. Hdc in the next 11 sts. Inc in the next 3 sts. Hdc in the next 11 sts. Inc in the last st. Join with a sl st to the first hdc. (34 sts)
Rnd 3: Ch 1. Hdc in the first st. *Inc in next st, hdc in next st*; rep from * to * 2 more times (this covers the curved end). Hdc in the next 11 sts. *Hdc in next st, inc in next st*; rep from * to * 2 more times. Hdc in the next 11 sts. Hdc in the last st. Join. (40 sts)
Rnd 4: Ch 1. Hdc in the first 2 sts. *Inc in next st, hdc in next 2 sts*; rep from * to * 2 more times. Hdc in the next 11 sts. *Hdc in next 2 sts, inc in next st*; rep from * to * 2 more times. Hdc in the next 11 sts. Hdc in last st. Join. (46 sts)
Rnd 5: Ch 1. Hdc in the first 3 sts. *Inc in next st, hdc in next 3 sts*; rep from * to * 2 more times. Hdc in the next 11 sts. *Hdc in next 3 sts, inc in next st*; rep from * to * 2 more times. Hdc in the next 11 sts. Hdc in last st. Join. (52 sts). Fasten off and weave in this end. Your bottom should measure approximately 4 inches wide by 9 inches long.
Part 2: The Body (Worked in continuous spirals)
Rnd 6: With the RS of the bottom facing you, attach the yarn with a sl st to the back loop of any stitch. Ch 1. Working in the back loop only of every stitch from now on: Sc in the same st and in each st around. Do not join. Place a marker in the first sc of this round. (52 sts)
Rnd 7: Hdc-blo in each st around. (52 sts)
Rnds 8-30: Rep Rnd 7. This is the main body of the bag. Continue working hdc-blo in every stitch until the piece measures approximately 8.5 inches tall from the bottom edge. You will have a total of 24 rounds of hdc-blo (Rounds 7-30).
Rnd 31 (Decrease Round for Shaping): Hdc-blo in the next 24 sts. Dec (hdc2tog-blo) over the next 2 sts. Hdc-blo in the next 24 sts. Dec. (50 sts)
Rnd 32: Hdc-blo in each st around. (50 sts)
Rnd 33: Hdc-blo in the next 23 sts. Dec. Hdc-blo in the next 23 sts. Dec. (48 sts)
Rnd 34: Hdc-blo in each st around. (48 sts)
Rnd 35: Hdc-blo in the next 22 sts. Dec. Hdc-blo in the next 22 sts. Dec. (46 sts)
Rnd 36: Hdc-blo in each st around. (46 sts) The top of the bag is now slightly tapered.
Part 3: The Top Hem & Handle Openings
Rnd 37 (Handle Opening Set-Up): Ch 1 (does not count as a st). Sc in the first 8 sts (working through both loops now). Ch 14 (this is the first handle opening). Skip the next 15 sts. Sc in the next 8 sts (the front of the bag). Ch 14 (this is the second handle opening). Skip the last 15 sts. Join with a sl st to the first sc of the round. (16 sc + 2 handle loops)
Rnd 38: Ch 1. Sc in the first 8 sts. Now, working along the chain of the handle opening: Sc in the next 14 ch. Sc in the next 8 sts. Sc in the next 14 ch. Join with a sl st to the first sc. (44 sts)
Rnd 39: Ch 1. Sc in each st around. Join. (44 sts)
Rnd 40: Ch 1. *Sc in next st, ch 1, skip 1 st*; rep from * to * around. Join with a sl st to the first sc. This creates a pretty picot-like edge. Fasten off and weave in all ends.
Part 4: The Handles (Make 2)
Note: These handles are worked in rows and then sewn on. They are designed to be thick and comfortable.
Row 1: Ch 8. Hdc in the 3rd ch from the hook and in each ch across. (6 hdc) Turn.
Row 2: Ch 2 (counts as first hdc). Hdc-blo in the next 5 sts. Hdc in the top of the turning ch. (6 hdc) Turn.
Rows 3-45: Rep Row 2. Continue until the handle measures approximately 18 inches long (or your desired handle length). Fasten off, leaving a long tail (approx. 20 inches) for sewing. You will have a firm, ribbed strap.
Finishing
Assembling the Handles
- Weave in the starting tail from each handle.
- Pin the handles to the inside of the bag. The handle openings (the ch-14 spaces) are your guide. The ends of the handle should be placed on the inside of the bag, directly underneath the handle openings. The handle should stick out through the opening. Ensure the handle is not twisted.
- Using the long tail and a yarn needle, securely sew the handle ends to the inside of the bag. Use a whip stitch or back stitch, going through both the handle and the bag fabric. Sew across the entire width of the handle (6 sts) and down about 1 inch to ensure it is very secure. Repeat for the second handle.
Attaching the Magnetic Snap (Optional)
- Position the snap. The bag opening is about 9 inches across. Center the magnetic snap halves on the inside of the bag, about 1 inch down from the top edge, between the two handle openings.
- Mark the prong locations with a pin or removable marker.
- Push the prongs of the snap through the fabric from the outside in. On the inside, fold the prongs flat using a small screwdriver or your fingernail.
- For extra security, apply a small dot of fabric glue over each prong to prevent snagging. Allow to dry completely before use.
Weaving Ends and Blocking
- Weave in ends: Use a yarn needle to weave all remaining yarn tails into the wrong side of the fabric. Weave in a zig-zag pattern for about 2 inches, then trim the excess close to the fabric.
- Blocking: Cotton yarn benefits from a gentle blocking to even out the stitches and give the bag a professional shape. Mist the bag with cool water until damp (do not soak). Gently shape the bag to its final dimensions (approx. 4” wide x 9” long x 9” tall). Pay special attention to the flat bottom and the sharp corners. Put a rolled towel inside the bag to help it hold its shape. Allow to air dry completely flat.
Tips
- Stitch Tension: The hdc-blo stitch can be a bit tricky to keep even. Try to keep your tension consistent. If your hands tend to tighten up as you crochet, consciously relax your grip every few rows. A consistent tension is the key to a professional-looking ribbed fabric.
- Measuring the Body: Because the hdc-blo stitch is slightly stretchy, it’s best to measure the bag body while it’s lying flat and not stretched out. The finished dimensions (4” x 9” x 9”) are for the relaxed bag. If you want a deeper bag, simply add more rounds between Rounds 7 and 30.
- Handle Placement: Before sewing the handles, try the bag on your shoulder. The handles should be long enough to comfortably fit over your arm or shoulder. Adjust the length of the handle (add or remove rows) to suit your preference. The pattern calls for an 18-inch handle, which is a standard shoulder length. For a hand-carry bag, make the handle only 12-14 inches long.