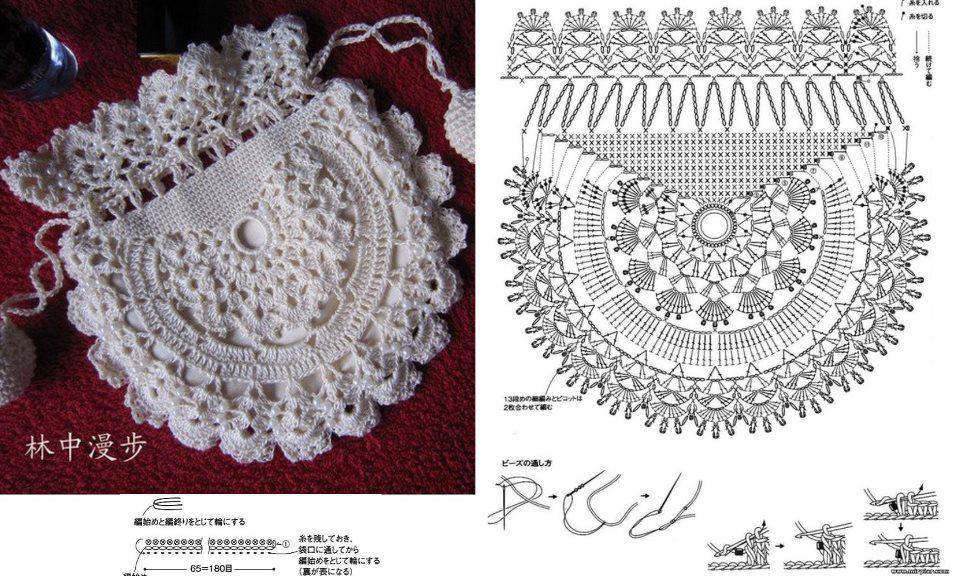
Small Crochet Purse
Materials Needed
- Yarn: Approximately 200-250 yards (183-229 meters) of worsted weight (#4) cotton or cotton-blend yarn. A smooth, non-splitting yarn is recommended for stitch definition. Sample uses Lion Brand 24/7 Cotton. You will need two contrasting colors: Color A (Main Color) – 150 yds, Color B (Accent Color) – 80 yds.
- Crochet Hook: Size G/6 (4.0 mm) or size needed to obtain gauge.
- Notions: Yarn needle, stitch markers (2-3), measuring tape, scissors.
- Bag Hardware (optional but recommended): One 10-inch (25 cm) zipper in a coordinating color, sewing needle and thread to match the zipper (or fabric glue), and a small piece of fabric for the lining (approx. 10” x 12”).
Gauge
4 inches (10 cm) square = 14 half double crochet stitches x 10 rows. Worked in the round with a G/6 hook. To check gauge, ch 16, hdc in 3rd ch from hook and across (14 hdc). Work even in rows for 10 rows. Measure the center 4 inches of your swatch after blocking. Adjust hook size if necessary.
Abbreviations (US Terms)
- ch(s) – chain(s)
- sl st – slip stitch
- sc – single crochet
- hdc – half double crochet
- dc – double crochet
- st(s) – stitch(es)
- sp – space
- sk – skip
- yo – yarn over
- BLO – back loop only
- FLO – front loop only
- RS – right side
- WS – wrong side
- rep – repeat
- rnd(s) – round(s)
- inc – increase (work 2 sts in same st)
- dec – decrease (hdc2tog or sc2tog as indicated)
Pattern Instructions
Important Note: This bag is worked in continuous rounds (spiral) unless otherwise stated. Do not join at the end of rounds unless instructed. Use a stitch marker to keep track of the first stitch of each round.
Part 1: Base of the Bag (Worked in Color A)
Foundation: Ch 2.
- Rnd 1: Work 6 sc in the second ch from the hook. Place marker. (6 sts)
- Rnd 2: 2 sc in each st around. (12 sts)
- Rnd 3: *Sc in next st, 2 sc in next st; rep from * around. (18 sts)
- Rnd 4: *Sc in next 2 sts, 2 sc in next st; rep from * around. (24 sts)
- Rnd 5: *Sc in next 3 sts, 2 sc in next st; rep from * around. (30 sts)
- Rnd 6: *Sc in next 4 sts, 2 sc in next st; rep from * around. (36 sts)
- Rnd 7: *Sc in next 5 sts, 2 sc in next st; rep from * around. (42 sts)
- Rnd 8: *Sc in next 6 sts, 2 sc in next st; rep from * around. (48 sts)
- Rnd 9: *Sc in next 7 sts, 2 sc in next st; rep from * around. (54 sts)
- Rnd 10: *Sc in next 8 sts, 2 sc in next st; rep from * around. (60 sts)
- Rnd 11: *Sc in next 9 sts, 2 sc in next st; rep from * around. (66 sts)
- Rnd 12: *Sc in next 10 sts, 2 sc in next st; rep from * around. (72 sts)
The base should measure approximately 6 inches (15 cm) in diameter. If you want a wider base, continue increasing evenly (adding 6 sts per round) until desired size, then proceed.
Part 2: Body of the Bag (Sides)
Rnd 13 (Setup Round): Working in the BLO of each stitch, sc in each st around. Do not join. This creates a crisp 90-degree turn for the bag walls. (72 sts)
Rnds 14-20: Sc in each st around (72 sts per round). You will now be working through both loops.
Rnd 21 (Color Change – Accent Stripe): Switch to Color B. Sc in each st around. (72 sts)
Rnd 22: With Color B, sc in each st around. (72 sts)
Rnd 23: Switch back to Color A. Sc in each st around. (72 sts)
Rnds 24-30: Continue with Color A, sc in each st around. (72 sts per round)
Rnd 31 (Second Accent Stripe): Switch to Color B. Sc in each st around. (72 sts)
Rnd 32: With Color B, sc in each st around. (72 sts)
Rnd 33: Switch to Color A. Sc in each st around. (72 sts)
Rnds 34-40: Continue with Color A, sc in each st around. (72 sts per round)
Rnd 41 (Final Accent Stripe): Switch to Color B. Sc in each st around. (72 sts)
Rnd 42: With Color B, sc in each st around. (72 sts)
Rnd 43: Switch to Color A. Sc in each st around. (72 sts)
Rnds 44-50: Continue with Color A, sc in each st around. (72 sts per round)
The body of the bag should now measure approximately 7-8 inches (18-20 cm) tall from the base. Adjust the number of rounds in the solid Color A sections if you desire a taller or shorter bag.
Part 3: Shaping the Top Edge & Flap (Front)
We will now work in rows to create the flat flap. The bag is currently a tube. We will leave the back of the bag untouched (these stitches will become the back edge) and work the flap across the front half of the stitches.
Step 1: Find the center. Flatten the bag so the seam from the base is on one side (this will be the side seam). Place a stitch marker at the left and right edges of the flattened bag. You should have 36 stitches on the front half (the flap) and 36 stitches on the back half (the back of the bag).
Step 2: Join yarn for the flap. With RS facing, join Color A with a sl st in the first stitch of the front 36 stitches (at the left marker).
Row 1 (RS): Ch 1, sc in the same st and in each of the next 35 sts. Turn. (36 sc)
Row 2 (WS): Ch 1, sc in the first st, sc2tog over next 2 sts, sc in next 30 sts, sc2tog over next 2 sts, sc in last st. Turn. (34 sts)
Row 3: Ch 1, sc in each st across. Turn. (34 sc)
Row 4: Ch 1, sc in first st, sc2tog, sc in next 28 sts, sc2tog, sc in last st. Turn. (32 sts)
Row 5: Ch 1, sc in each st across. Turn. (32 sc)
Row 6: Ch 1, sc in first st, sc2tog, sc in next 26 sts, sc2tog, sc in last st. Turn. (30 sts)
Row 7: Ch 1, sc in each st across. Turn. (30 sc)
Row 8: Ch 1, sc in first st, sc2tog, sc in next 24 sts, sc2tog, sc in last st. Turn. (28 sts)
Row 9: Ch 1, sc in each st across. Turn. (28 sc)
Row 10: Ch 1, sc in first st, sc2tog, sc in next 22 sts, sc2tog, sc in last st. Turn. (26 sts)
Row 11: Ch 1, sc in each st across. Turn. (26 sc)
Row 12: Ch 1, sc in first st, sc2tog, sc in next 20 sts, sc2tog, sc in last st. Turn. (24 sts)
Row 13: Ch 1, sc in each st across. Turn. (24 sc)
Row 14: Ch 1, sc in first st, sc2tog, sc in next 18 sts, sc2tog, sc in last st. Turn. (22 sts)
Row 15: Ch 1, sc in each st across. Turn. (22 sc)
Row 16: Ch 1, sc in first st, sc2tog, sc in next 16 sts, sc2tog, sc in last st. Turn. (20 sts)
Row 17: Ch 1, sc in each st across. Turn. (20 sc)
Row 18: Ch 1, sc in first st, sc2tog, sc in next 14 sts, sc2tog, sc in last st. Turn. (18 sts)
Row 19: Ch 1, sc in each st across. Turn. (18 sc)
Row 20: Ch 1, sc in first st, sc2tog, sc in next 12 sts, sc2tog, sc in last st. Turn. (16 sts)
Row 21: Ch 1, sc in each st across. Turn. (16 sc)
Row 22: Ch 1, sc in first st, sc2tog, sc in next 10 sts, sc2tog, sc in last st. Turn. (14 sts)
Row 23: Ch 1, sc in each st across. Turn. (14 sc)
Row 24: Ch 1, sc in first st, sc2tog, sc in next 8 sts, sc2tog, sc in last st. Turn. (12 sts)
Row 25: Ch 1, sc in each st across. Turn. (12 sc)
Row 26: Ch 1, sc in first st, sc2tog, sc in next 6 sts, sc2tog, sc in last st. Turn. (10 sts)
Row 27: Ch 1, sc in each st across. Turn. (10 sc)
Row 28: Ch 1, sc in first st, sc2tog, sc in next 4 sts, sc2tog, sc in last st. Turn. (8 sts)
Row 29: Ch 1, sc in each st across. Turn. (8 sc)
Row 30: Ch 1, sc in first st, sc2tog, sc in next 2 sts, sc2tog, sc in last st. Turn. (6 sts)
Row 31: Ch 1, sc in each st across. Turn. (6 sc)
Row 32: Ch 1, sc in first st, sc2tog, sc in next 0 sts, sc2tog, sc in last st. Turn. (4 sts)
Row 33: Ch 1, sc in each st across. (4 sc) Fasten off, leaving a long tail for sewing.
Part 4: Back Edge & Strap
Back Edge Trim: With RS facing, join Color A with a sl st to the first stitch of the back panel (the 36 stitches we left untouched). Ch 1, sc evenly across the 36 stitches. Fasten off.
Strap (Make 2 – one for each side):
The strap is worked separately and sewn on. This gives a clean, professional finish.
- With Color A, ch 8.
- Row 1: Sc in the 2nd ch from hook and in each ch across. Turn. (7 sc)
- Rows 2-50: Ch 1, sc in each st across. Turn. (7 sc per row)
- Continue until the strap measures approximately 22 inches (56 cm) or your desired length. Fasten off, leaving a long tail for sewing. Repeat for the second strap (you will have two identical straps).
Finishing
- Weave in ends: Using a yarn needle, weave in all loose ends from the color changes and the flap. Be sure to weave them in on the inside of the bag for a neat appearance.
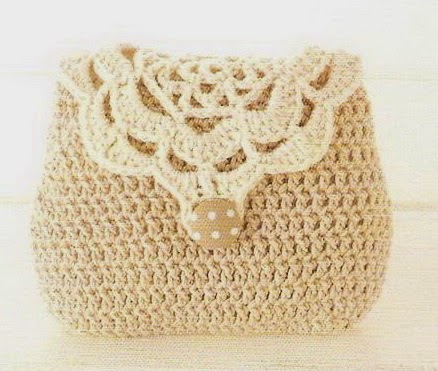
- Attach the flap: Fold the flap down over the front of the bag. Using the long tail from the tip of the flap, sew the last row (4 stitches) to the front of the bag. For a magnetic snap or button closure, sew a button to the front of the bag at the center, and create a loop from ch sts at the tip of the flap (before sewing it down). Alternatively, sew a magnetic snap between the flap and the bag body.
- Sew the straps: Position each strap on the inside of the bag at the side seams. The bottom of the strap should sit about 1.5 inches (4 cm) down from the top edge. Using the long tails, sew the ends of each strap securely to the inside of the bag. Sew a small reinforcing square (approx. 1” x 1”) over each strap end on the inside for durability.
- Lining (Optional but Recommended): Cut a piece of lining fabric to match the interior dimensions of the bag (approx. 10” wide x 9” tall). Fold in half, sew the side seams, and insert into the bag. Fold the top edge of the fabric over by ½ inch and hand-stitch it to the inside of the bag just below the top edge. If using a zipper, sew the zipper to the fabric lining first, then attach the lining to the bag. This gives a polished, professional finish and prevents stretching.
- Blocking: Lightly steam block the bag. Do not press heavily. Simply hold a steam iron 1 inch away from the fabric and steam until the stitches relax. Lay flat to dry. This will even out the stitches and shape the flap.
Tips
- Tip 1: Keep your tension consistent. Because this bag is worked in a spiral, uneven tension can cause the sides to slant. Count your stitches every few rounds to ensure you still have 72 stitches. If your stitch count is off, the flap will not align properly.
- Tip 2: Use a stitch marker for the first stitch of every round. This is critical for spiral work. Move the marker up as you complete each round. This prevents you from accidentally adding or