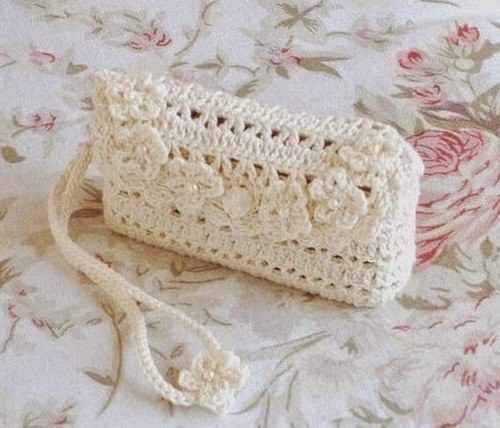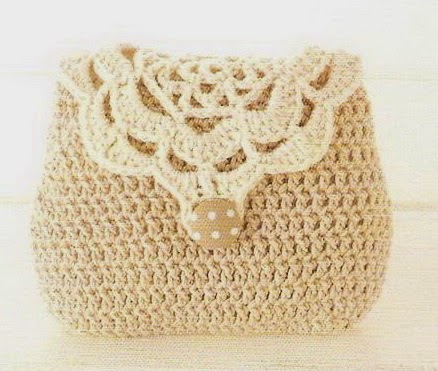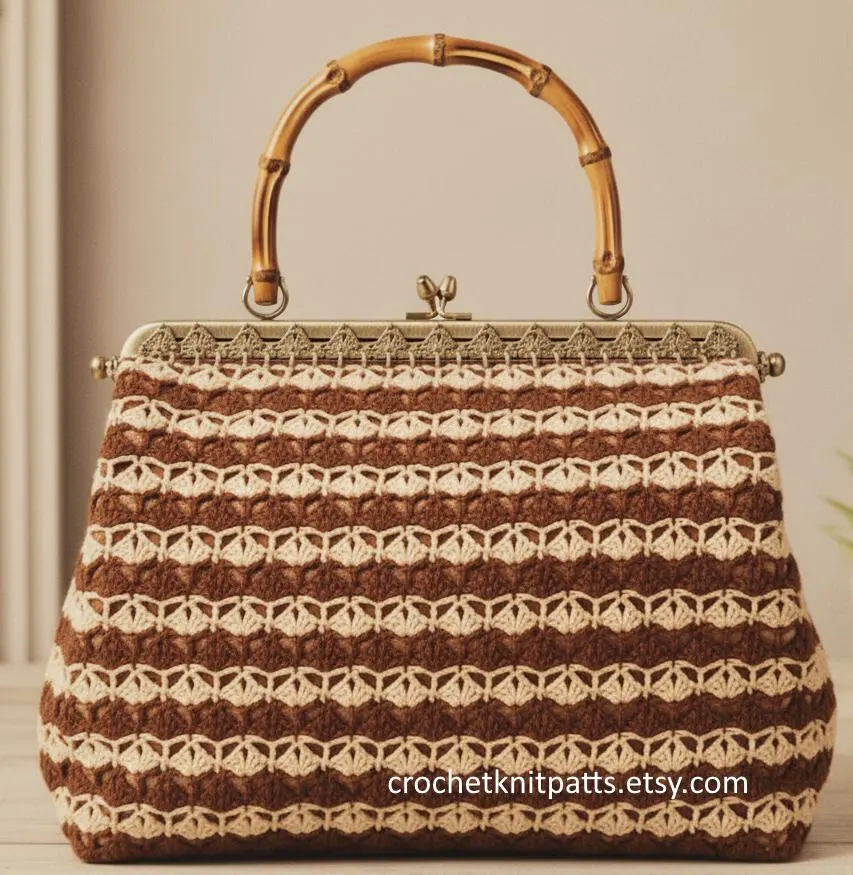
Retro Crochet Clutch Handbag Pattern
Materials Needed
- Yarn: Approximately 200-250 yards (183-229 meters) of worsted weight (Category 4) cotton or cotton-blend yarn. A smooth, non-splitting yarn is recommended for stitch definition. Shown in a solid, medium-toned color.
- Crochet Hook: Size H/8 (5.0 mm) or size needed to obtain gauge.
- Notions: Yarn needle for weaving ends, 1-inch (25 mm) magnetic snap closure (optional, but recommended for a secure closure), stitch markers (optional, for counting rounds), sewing needle and thread (if attaching a magnetic snap).
- Lining (Optional but Recommended): ⅓ yard of lightweight cotton fabric, matching thread, sewing pins.
Gauge
Gauge Swatch: 14 half double crochets (hdc) x 10 rows = 4 inches (10 cm) square, worked in rows.
To ensure your bag is the correct size, always check your gauge. If your swatch is smaller, try a larger hook. If larger, try a smaller hook.
Finished Size/Dimensions
Width: 9 inches (23 cm) across the bottom.
Height: 8 inches (20 cm) from the center of the bottom to the top edge.
Depth: 3 inches (7.5 cm) at the base.
Strap Length: Approximately 24 inches (61 cm) from top of bag to top of shoulder (adjustable).
Abbreviations (US Terms)
- ch: chain
- sc: single crochet
- hdc: half double crochet
- dc: double crochet
- st(s): stitch(es)
- sl st: slip stitch
- sk: skip
- rep: repeat
- rnd(s): round(s)
- RS: right side
- WS: wrong side
- BLO: back loop only
- FLO: front loop only
- inc: increase (work 2 sts in same st)
- dec: decrease (work 2 sts together as one)
Pattern Instructions
Important Note: This bag is worked in the round from the bottom up. The base is created using an oval construction, which gives the bag a flat bottom and structured sides. All rounds are joined with a slip stitch to the first stitch of the round, unless otherwise stated. Do not turn unless instructed.
Part 1: The Base (Worked in the Round)
Foundation: Ch 16.
Rnd 1 (RS): Starting in the 2nd ch from the hook, work 2 sc in that ch. Work 1 sc in each of the next 13 ch. In the last ch, work 3 sc (this turns the corner). Now, working along the opposite side of the foundation chain, work 1 sc in each of the next 13 ch (you will be working into the unused loops of the ch). In the final space (the same base as your first 2 sc), work 1 more sc. Join with a sl st to the first sc of the round. (Total: 32 sts)
Rnd 2: Ch 1. 2 sc in the next st (this is the first st of the previous round). 1 sc in each of the next 13 sts. *2 sc in each of the next 3 sts* (this works the corner increases). 1 sc in each of the next 13 sts. 2 sc in each of the next 2 sts. Join with a sl st to the first sc. (Total: 38 sts)
Rnd 3: Ch 1. *1 sc in the next st, 2 sc in the next st* (inc made). 1 sc in each of the next 13 sts. *1 sc in the next st, 2 sc in the next st; rep from * two more times (3 total increases on this side). 1 sc in each of the next 13 sts. *1 sc in the next st, 2 sc in the next st; rep from * once more. Join. (Total: 44 sts)
Rnd 4: Ch 1. *1 sc in each of the next 2 sts, 2 sc in the next st.* 1 sc in each of the next 13 sts. *1 sc in each of the next 2 sts, 2 sc in the next st; rep from * two more times. 1 sc in each of the next 13 sts. *1 sc in each of the next 2 sts, 2 sc in the next st; rep from * once more. Join. (Total: 50 sts)
Rnd 5: Ch 1. *1 sc in each of the next 3 sts, 2 sc in the next st.* 1 sc in each of the next 13 sts. *1 sc in each of the next 3 sts, 2 sc in the next st; rep from * two more times. 1 sc in each of the next 13 sts. *1 sc in each of the next 3 sts, 2 sc in the next st; rep from * once more. Join. (Total: 56 sts)
Rnd 6: Ch 1. *1 sc in each of the next 4 sts, 2 sc in the next st.* 1 sc in each of the next 13 sts. *1 sc in each of the next 4 sts, 2 sc in the next st; rep from * two more times. 1 sc in each of the next 13 sts. *1 sc in each of the next 4 sts, 2 sc in the next st; rep from * once more. Join. (Total: 62 sts)
Rnd 7: Ch 1. *1 sc in each of the next 5 sts, 2 sc in the next st.* 1 sc in each of the next 13 sts. *1 sc in each of the next 5 sts, 2 sc in the next st; rep from * two more times. 1 sc in each of the next 13 sts. *1 sc in each of the next 5 sts, 2 sc in the next st; rep from * once more. Join. (Total: 68 sts)
Your oval base should now measure approximately 9 inches long and 3 inches wide. If you need a slightly larger or smaller base, you can work an additional round (Rnd 8: *sc in next 6 sts, inc*, etc.) or omit Rnd 7. The stitch count must be an even number for the next section.
Part 2: The Body (Sides of the Bag)
Rnd 8 (Establishing the sides): Ch 1. Working in the back loop only (BLO) of each stitch around, work 1 sc in every st. Join with a sl st to the first sc. This creates a crisp, clean fold line at the base of the bag. (68 sts)
Rnd 9: Ch 1. 1 hdc in the first st. *Sk 1 st, 2 dc in the next st, ch 1, 2 dc in the next st (this creates a "V-stitch" cluster), sk 1 st, 1 hdc in the next st.* Rep from * to * around. You will end with a V-stitch, then join with a sl st to the first hdc. (You will have 17 V-stitches and 17 hdc stitches, totaling 68 sts counting the ch-1 spaces).
Rnd 10: Ch 1. 1 hdc in the first hdc. *Work a V-stitch (2 dc, ch 1, 2 dc) into the center ch-1 space of the V-stitch from the previous round. 1 hdc in the next hdc.* Rep from * to * around. Join with a sl st to the first hdc.
Rnds 11-22: Repeat Rnd 10. After completing Rnd 22, your bag body should measure approximately 7.5 inches from the fold line at the base.
Rnd 23 (Final body round - optional pattern variation): Ch 1. 1 sc in the first hdc. *Work 1 sc into each of the next 2 dc, 1 sc into the ch-1 space, 1 sc into each of the next 2 dc. 1 sc into the next hdc.* Rep from * to * around. Join with a sl st to the first sc. This evens out the stitch count for the edging. (68 sc)
Part 3: Top Edging & Strap
Rnd 24 (Edging): Ch 1. Work 1 sc in the BLO of every sc around. Join. (68 sts)
Rnd 25 (Fold line for strap): Ch 1. Work 1 sc in the front loop only (FLO) of every st around. Join. (68 sts)
Rnd 26 (Strap foundation): Ch 1. *1 sc in each of the next 10 sts. Ch 3, sk 3 sts (this creates the first strap attachment point). 1 sc in each of the next 21 sts. Ch 3, sk 3 sts (second strap attachment point). 1 sc in each of the next 10 sts.* Join with a sl st to the first sc. Fasten off and weave in ends. (62 sc + 2 ch-3 spaces)
Part 4: The Strap (Worked Flat)
The strap is worked in two separate pieces and then sewn together, or you can work it as one long piece and attach it. Instructions are for a single, long strap.
Strap: Make a slip knot.
Row 1: Ch 6. 1 sc in the 2nd ch from hook and in each ch across. Turn. (5 sc)
Row 2: Ch 1. 1 sc in the BLO of each st across. Turn. (5 sc)
Rows 3 - 120 (or until strap reaches 24 inches): Repeat Row 2.
Final Row: Ch 1. 1 sc in the BLO of each st across. Do not fasten off. You will use this working yarn to sew the strap to the bag.
To adjust strap length: For a shorter strap (hand-held or arm-crook), work to 12-14 inches. For a cross-body, work to 30-36 inches.
Finishing
1. Attach the Strap: Pin the ends of the strap to the inside of the bag, aligning them with the ch-3 spaces you created in Round 26. The strap end should sit just below the FLO fold line. Using the yarn tail from the strap and a yarn needle, sew the strap securely to the inside of the bag. Sew through both layers of the strap and the bag body for a strong hold. Repeat for the other end of the strap (if you made a single piece, fold the strap in half and sew both ends at once; if you made two halves, sew the second half to the other side).
2. Weave in Ends: Using a yarn needle, weave in all loose ends from the base, body, and strap attachments. Weave them in on the wrong side (the inside of the bag) for a clean finish.
3. Blocking (Optional but Recommended): Lightly steam block the bag. Do not press directly with an iron. Hold a steaming iron about 1 inch away from the surface and steam the bag to relax the stitches and set the shape. Allow to dry completely flat. This helps the V-stitch pattern open up and lie beautifully.
4. Adding a Lining (Recommended): Cut two rectangles of fabric, each 1 inch wider and 1 inch taller than the finished bag's width and height. With right sides together, sew the side and bottom seams of the fabric, leaving a ½-inch seam allowance. Fold the top edge down by ½ inch and press. Insert the fabric bag into the crochet bag. Using a sewing needle and thread, hand-stitch the lining's top edge to the inside of the bag, just below the FLO fold line of Round 25. This will hide the strap attachments and give the bag a professional finish.
5. Adding a Magnetic Snap: If desired, sew a magnetic snap closure onto the lining, centered at the top edge of the bag. Follow the manufacturer's instructions for attaching the snap. This keeps your belongings secure.
Tips
- Tension Matters: The V-stitch pattern is very forgiving, but consistent tension is key for a professional look. If your V-stitches are too tight, the bag will curl inward. If too loose, the bag will sag. Practice the stitch on a swatch if needed.
- Strap Customization: The BLO sc stitch used for the strap creates a dense, non-stretchy, braid-like fabric. This is perfect for a bag strap because it won't stretch out over time. For extra durability, you can work the strap with two strands of yarn held together.
- Color Blocking: This pattern is ideal for color blocking. Try working the base in a contrasting color, then switching to the main color for the body. You can also add a stripe by changing yarn colors every 2-3 rounds in the body section. Just carry the unused yarn up the inside loosely.