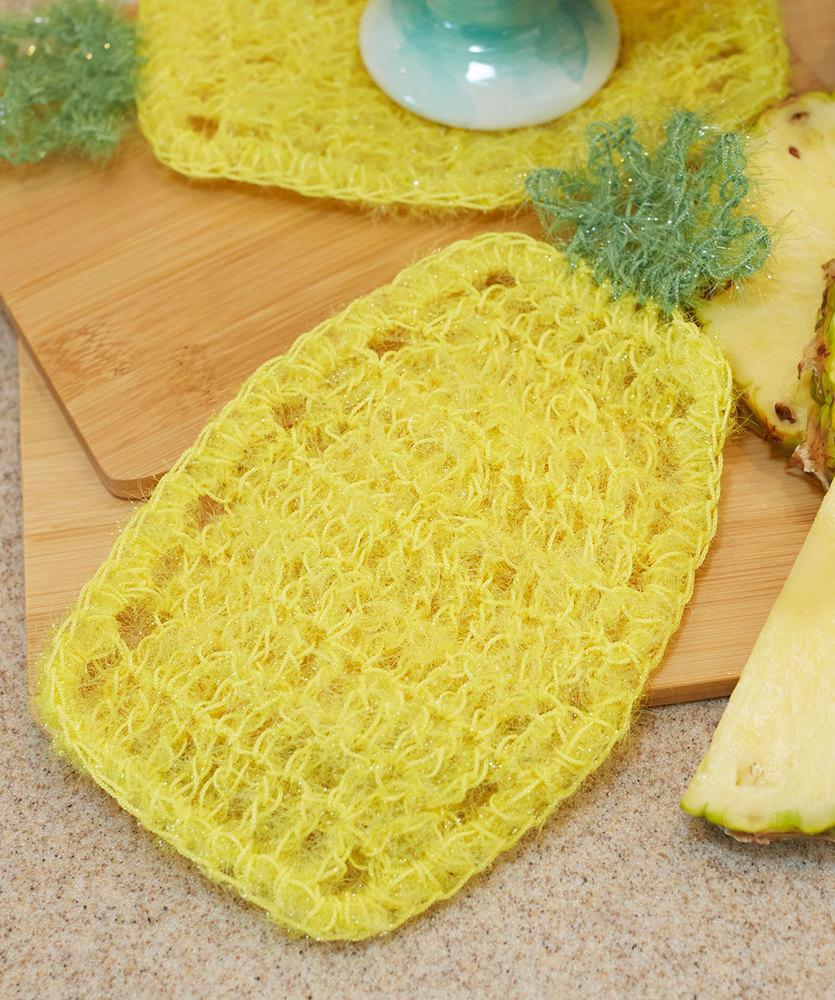
Pineapple Scrubby Dishcloth Free Crochet Pattern
Materials Needed
- Yarn: Approximately 1100 yards (1000 meters) of worsted weight (#4 Medium) cotton or cotton-blend yarn. This pattern uses approximately 650 yds (594 m) for the main color (MC) and 450 yds (411 m) for the contrasting color (CC). Example: 3 skeins of Lily Sugar‘n Cream in “Ecru” (MC) and 2 skeins in “Teal” (CC).
- Crochet Hook: Size H/8 (5.0 mm), or size needed to obtain gauge.
- Notions: Yarn needle, scissors, stitch markers (optional), tape measure.
- Finished Size: Approximately 18 inches (45.7 cm) wide by 18 inches (45.7 cm) long, excluding the border.
Gauge
14 single crochet stitches x 16 rows = 4 inches (10 cm) square in single crochet, worked in the back loop only. Gauge is critical for this project. If your gauge is off, your fabric will be the wrong size and the textured stripes will not align properly. Adjust your hook size up or down as needed.
Abbreviations (US Terms)
- ch – chain
- sc – single crochet
- sc2tog – single crochet 2 together (decrease)
- hdc – half double crochet
- dc – double crochet
- sl st – slip stitch
- st(s) – stitch(es)
- rep – repeat
- RS – right side
- WS – wrong side
- BLO – back loop only
- MC – main color
- CC – contrasting color
Pattern Instructions
Important Construction Note
This dishcloth is worked flat in rows from the bottom up. The main body of the cloth uses a simple, repeating diagonal texture created by working single crochet stitches in the back loop only, combined with a slight offset in the second color. The border is worked in the round after the main square is complete, adding a polished, finished edge. You will carry the unused color up the side of your work, so there is no need to cut yarn after each stripe.
Main Body (Make 1)
With MC, ch 56 loosely. (This gives a width of approximately 18 inches after blocking.)
Row 1 (RS): Sc in 2nd ch from hook and in each ch across. Turn. (55 sts)
Row 2: Ch 1 (does not count as a st), sc in BLO of each st across. Turn. (55 sts)
Row 3 (Stripe Row 1 – MC): Ch 1, sc in BLO of each st across. Turn. (55 sts)
Row 4 (Stripe Row 2 – CC): Change to CC by drawing up a loop of CC in the last st of Row 3. Cut MC, leaving a 6-inch tail. Do not fasten off CC. Ch 1 (does not count as a st), sc in BLO of each st across. Turn. (55 sts)
Row 5 (Stripe Row 3 – CC): Ch 1, sc in BLO of each st across. Turn. (55 sts)
Row 6 (Stripe Row 4 – CC): Ch 1, sc in BLO of each st across. Turn. (55 sts)
Row 7 (Stripe Row 5 – MC): Change back to MC by drawing up a loop of MC in the last st of Row 6. Cut CC, leaving a 6-inch tail. Do not fasten off MC. Ch 1, sc in BLO of each st across. Turn. (55 sts)
Row 8 (Stripe Row 6 – MC): Ch 1, sc in BLO of each st across. Turn. (55 sts)
Row 9 (Stripe Row 7 – MC): Ch 1, sc in BLO of each st across. Turn. (55 sts)
Row 10 (Stripe Row 8 – CC): Change to CC as before. Cut MC. Ch 1, sc in BLO of each st across. Turn. (55 sts)
Row 11 (Stripe Row 9 – CC): Ch 1, sc in BLO of each st across. Turn. (55 sts)
Row 12 (Stripe Row 10 – CC): Ch 1, sc in BLO of each st across. Turn. (55 sts)
Row 13 (Stripe Row 11 – MC): Change to MC. Cut CC. Ch 1, sc in BLO of each st across. Turn. (55 sts)
Row 14 (Stripe Row 12 – MC): Ch 1, sc in BLO of each st across. Turn. (55 sts)
Row 15 (Stripe Row 13 – MC): Ch 1, sc in BLO of each st across. Turn. (55 sts)
Row 16 (Stripe Row 14 – CC): Change to CC. Cut MC. Ch 1, sc in BLO of each st across. Turn. (55 sts)
Row 17 (Stripe Row 15 – CC): Ch 1, sc in BLO of each st across. Turn. (55 sts)
Row 18 (Stripe Row 16 – CC): Ch 1, sc in BLO of each st across. Turn. (55 sts)
Row 19 (Stripe Row 17 – MC): Change to MC. Cut CC. Ch 1, sc in BLO of each st across. Turn. (55 sts)
Row 20 (Stripe Row 18 – MC): Ch 1, sc in BLO of each st across. Turn. (55 sts)
Row 21 (Stripe Row 19 – MC): Ch 1, sc in BLO of each st across. Turn. (55 sts)
Row 22 (Stripe Row 20 – CC): Change to CC. Cut MC. Ch 1, sc in BLO of each st across. Turn. (55 sts)
Row 23 (Stripe Row 21 – CC): Ch 1, sc in BLO of each st across. Turn. (55 sts)
Row 24 (Stripe Row 22 – CC): Ch 1, sc in BLO of each st across. Turn. (55 sts)
Row 25 (Stripe Row 23 – MC): Change to MC. Cut CC. Ch 1, sc in BLO of each st across. Turn. (55 sts)
Row 26 (Stripe Row 24 – MC): Ch 1, sc in BLO of each st across. Turn. (55 sts)
Row 27 (Stripe Row 25 – MC): Ch 1, sc in BLO of each st across. Turn. (55 sts)
Row 28 (Stripe Row 26 – CC): Change to CC. Cut MC. Ch 1, sc in BLO of each st across. Turn. (55 sts)
Row 29 (Stripe Row 27 – CC): Ch 1, sc in BLO of each st across. Turn. (55 sts)
Row 30 (Stripe Row 28 – CC): Ch 1, sc in BLO of each st across. Turn. (55 sts)
Row 31 (Stripe Row 29 – MC): Change to MC. Cut CC. Ch 1, sc in BLO of each st across. Turn. (55 sts)
Row 32 (Stripe Row 30 – MC): Ch 1, sc in BLO of each st across. Turn. (55 sts)
Row 33 (Stripe Row 31 – MC): Ch 1, sc in BLO of each st across. Turn. (55 sts)
Row 34 (Stripe Row 32 – CC): Change to CC. Cut MC. Ch 1, sc in BLO of each st across. Turn. (55 sts)
Row 35 (Stripe Row 33 – CC): Ch 1, sc in BLO of each st across. Turn. (55 sts)
Row 36 (Stripe Row 34 – CC): Ch 1, sc in BLO of each st across. Turn. (55 sts)
Row 37 (Stripe Row 35 – MC): Change to MC. Cut CC. Ch 1, sc in BLO of each st across. Turn. (55 sts)
Row 38 (Stripe Row 36 – MC): Ch 1, sc in BLO of each st across. Turn. (55 sts)
Row 39 (Stripe Row 37 – MC): Ch 1, sc in BLO of each st across. Turn. (55 sts)
Row 40 (Stripe Row 38 – CC): Change to CC. Cut MC. Ch 1, sc in BLO of each st across. Turn. (55 sts)
Row 41 (Stripe Row 39 – CC): Ch 1, sc in BLO of each st across. Turn. (55 sts)
Row 42 (Stripe Row 40 – CC): Ch 1, sc in BLO of each st across. Turn. (55 sts)
Row 43 (Stripe Row 41 – MC): Change to MC. Cut CC. Ch 1, sc in BLO of each st across. Turn. (55 sts)
Row 44 (Stripe Row 42 – MC): Ch 1, sc in BLO of each st across. Turn. (55 sts)
Row 45 (Stripe Row 43 – MC): Ch 1, sc in BLO of each st across. Turn. (55 sts)
Row 46 (Stripe Row 44 – CC): Change to CC. Cut MC. Ch 1, sc in BLO of each st across. Turn. (55 sts)
Row 47 (Stripe Row 45 – CC): Ch 1, sc in BLO of each st across. Turn. (55 sts)
Row 48 (Stripe Row 46 – CC): Ch 1, sc in BLO of each st across. Turn. (55 sts)
Row 49 (Stripe Row 47 – MC): Change to MC. Cut CC. Ch 1, sc in BLO of each st across. Turn. (55 sts)
Row 50 (Stripe Row 48 – MC): Ch 1, sc in BLO of each st across. Turn. (55 sts)
Row 51 (Stripe Row 49 – MC): Ch 1, sc in BLO of each st across. Turn. (55 sts)
Row 52 (Stripe Row 50 – CC): Change to CC. Cut MC. Ch 1, sc in BLO of each st across. Turn. (55 sts)
Row 53 (Stripe Row 51 – CC): Ch 1, sc in BLO of each st across. Turn. (55 sts)
Row 54 (Stripe Row 52 – CC): Ch 1, sc in BLO of each st across. Turn. (55 sts)
Row 55 (Stripe Row 53 – MC): Change to MC. Cut CC. Ch 1, sc in BLO of each st across. Do NOT turn. (55 sts)
Fasten off MC, leaving an 8-inch tail for weaving. Your square should now measure approximately 18 inches tall. If it is shorter, you can add a few more rows of MC at the top, but keep the stripe pattern symmetrical if you do.
Border
Do not turn the square. With RS facing, attach CC with a sl st into the top right corner of the last row you just worked (Row 55). You will now work in the round around the entire square.
Round 1: Ch 1 (does not count as a st), work 3 sc into the corner space (the same st you joined to). Work sc evenly across the top edge (the last row you made), placing 1 sc into each sc of Row 55. When you reach the top left corner, work 3 sc into the corner space. Rotate the square to work down the left side. Work 1 sc into the side of each row (the edge of the strips). There are 55 rows, so you will work 55 sc down the side. When you reach the bottom left corner, work 3 sc into the corner space. Rotate to work across the bottom foundation chain. Work 1 sc into each of the 55 foundation ch sts. When you reach the bottom right corner, work 3 sc into the corner space. Rotate to work up the right side. Work 1 sc into the side of each row (55 sc). Join with a sl st to the first sc of the round. (Total sts: 55+55+55+55 + 12 corner sts = 232 sts)
Round 2: Ch 1 (does not count as a st), *sc in each st across the side until you reach the corner, work 3 sc into the center sc of the corner 3-sc group from the previous round. Rep from * around the entire square. Join with a sl st to the first sc. (240 sts)
Round 3: Ch 1 (does not count as a st), *sc in each st across the side until you reach the corner, work 3 sc into the center sc of the corner 3-sc group from the previous round. Rep from * around the entire square. Join with a sl st to the first sc. (248 sts)
Round 4 (Edging): Ch 1, *sc in next st, ch 3, skip 1 st. Rep from * around the entire square, working a sc + ch 3 + sc into each corner to keep the corner sharp. Join with a sl st to the first sc. Fasten off, leaving a 6-inch tail.
Finishing
- Weave in all ends: Using a yarn needle, carefully weave in all the tails from the color changes along the side edges. Weave them in on the WS, going in opposite directions and through the back loops of the stitches to hide them. Trim any excess yarn close to the fabric.
- Weave in border tails: Weave in the starting and ending tails from the border rounds.
- Blocking (Highly Recommended): This step is essential for a professional-looking dishcloth. Soak the finished cloth in cool water with a drop of mild soap for 15 minutes. Rinse thoroughly. Gently squeeze out excess water (do not wring). Lay flat on a clean towel, roll up to remove more moisture. Unroll and pin the cloth to the desired 18x18 inch shape on a blocking mat, using rust-proof pins. Pay attention to the corners (they should be 90 degrees). Allow to air dry completely.
- Final touch: Once dry, you can gently steam the cloth with an iron (no direct contact) to set the stitches and flatten the border.
Tips
- Carrying Yarn Up the Side: When changing colors, do not cut the yarn each time unless instructed. Instead, carry the unused color loosely up the side of the work. This creates a neat, straight edge and saves time weaving ends. To avoid pulling too tight, make sure the carried yarn is not shorter than the fabric edge. Every 5-6 rows, you can twist the carried yarn with the working yarn to secure it.