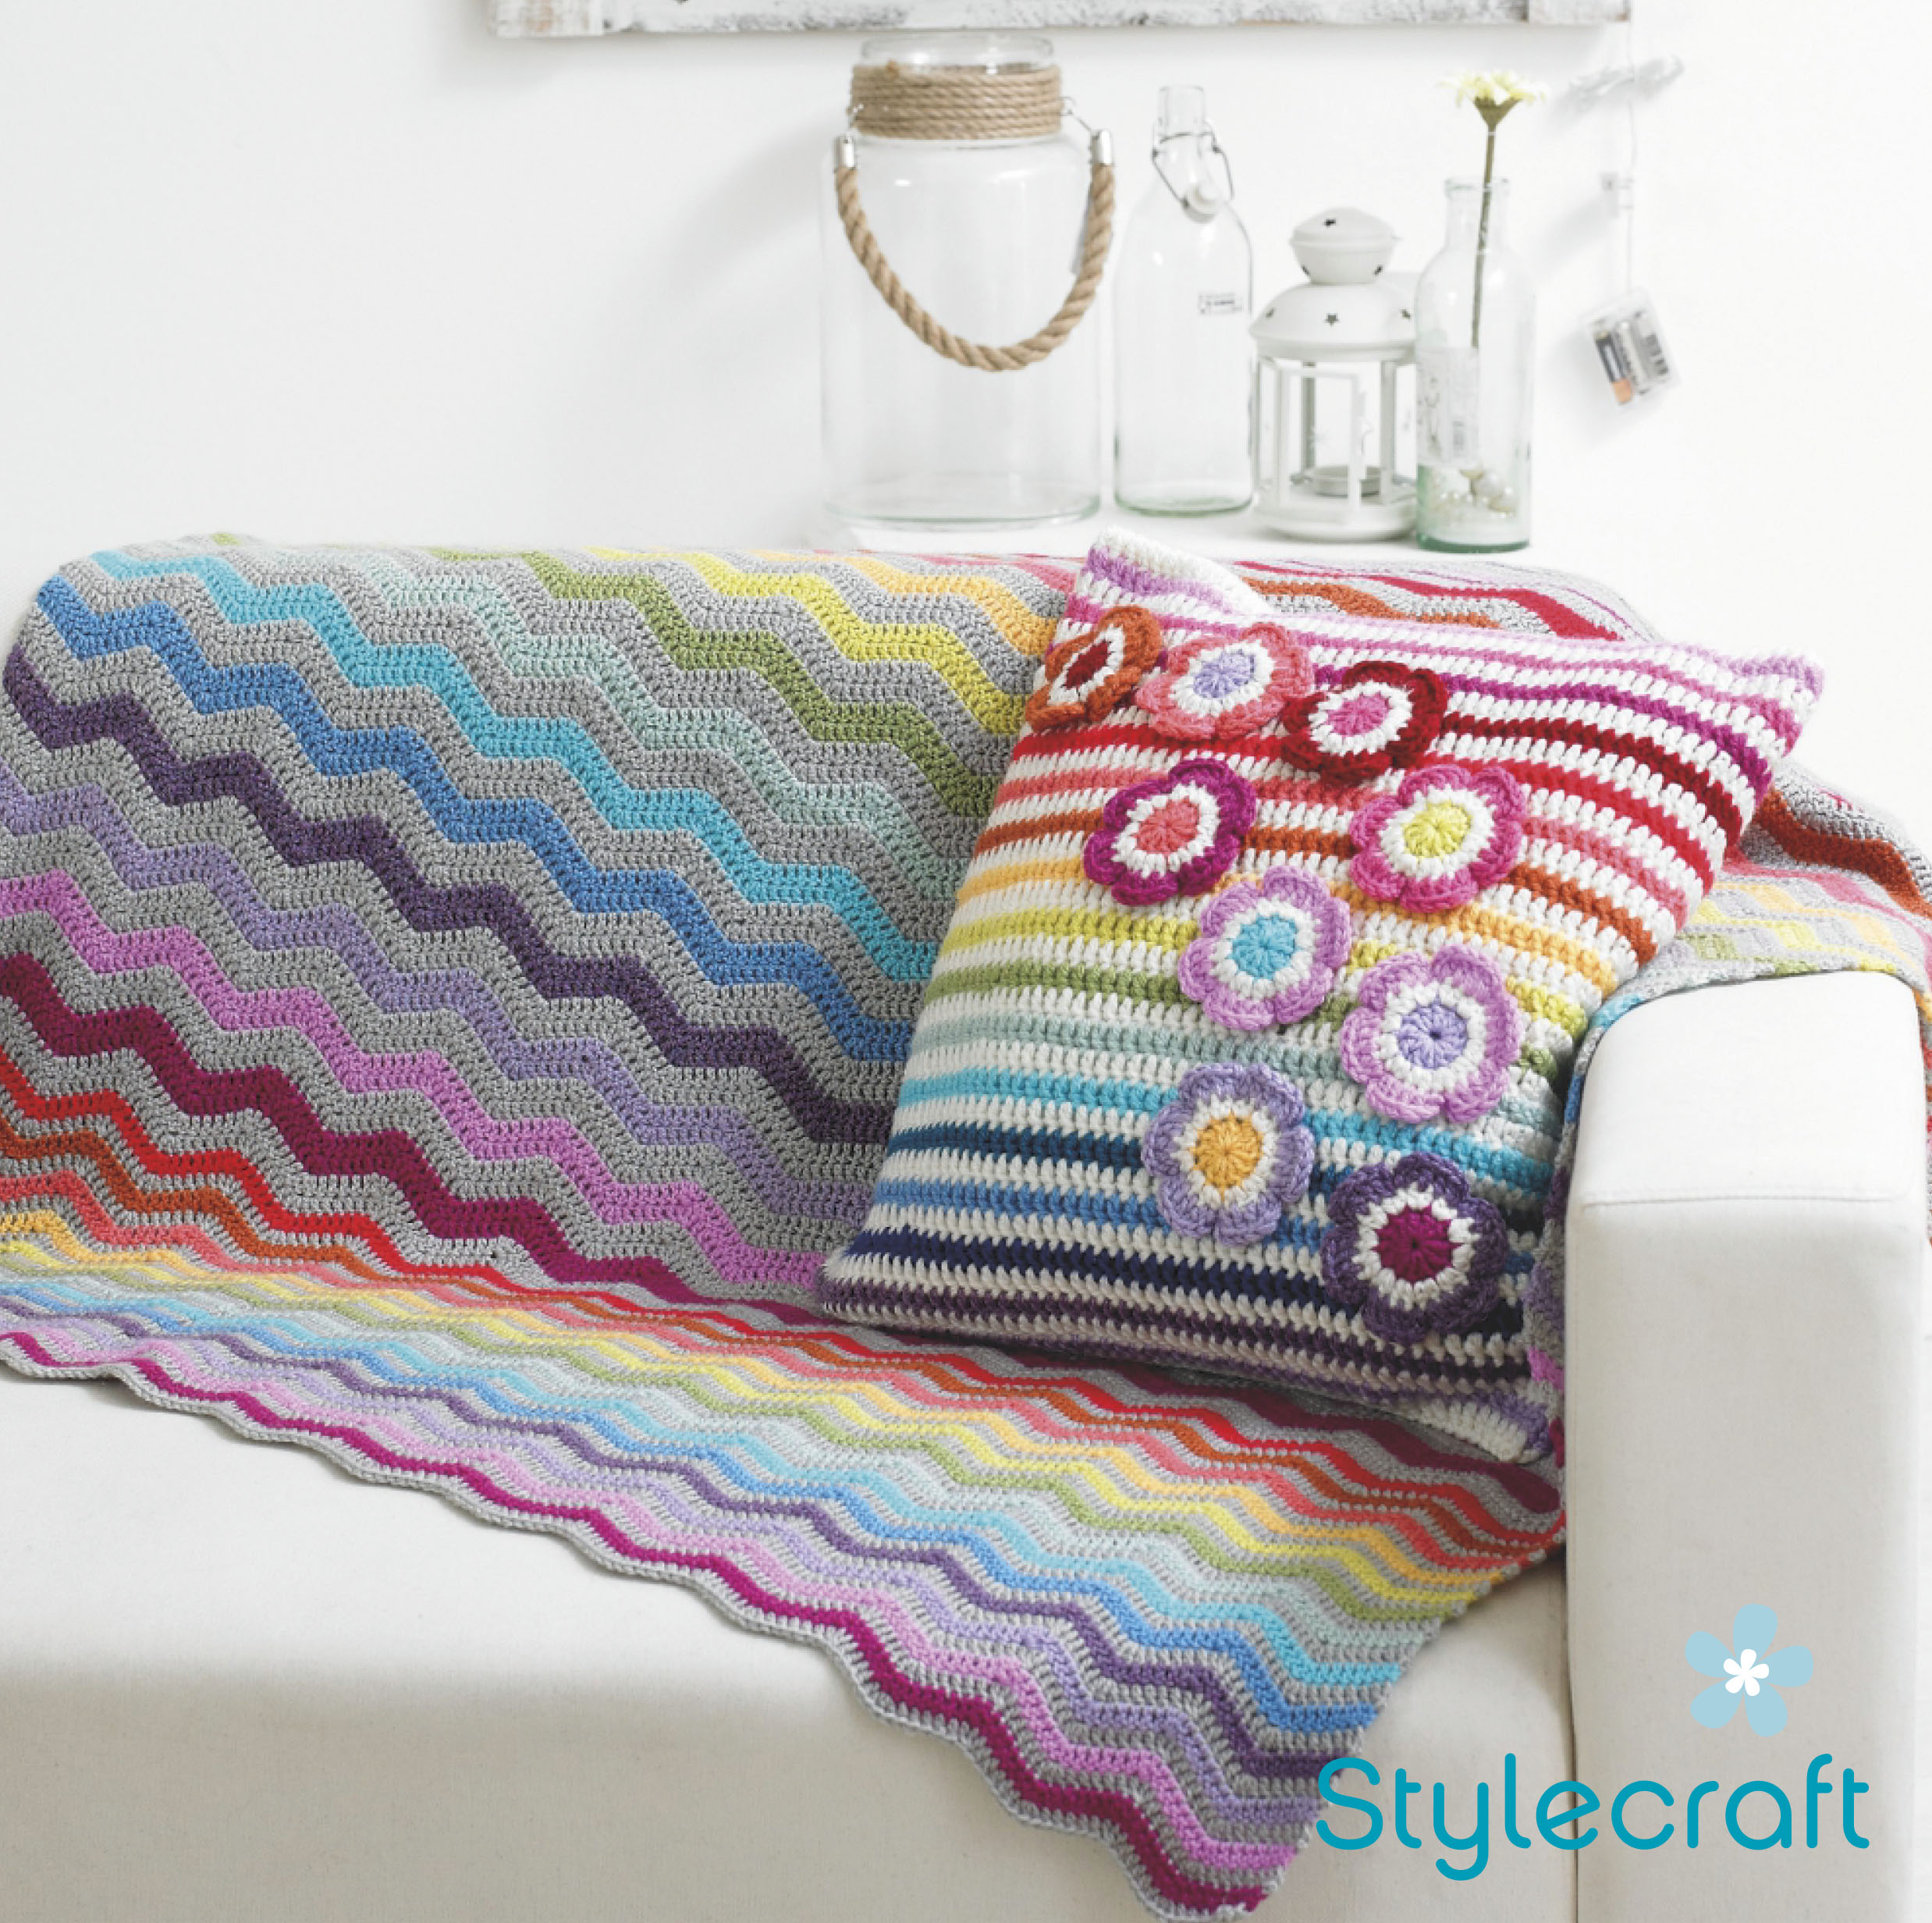
Free Crochet Pattern for a Ripple Blanket and Cushion
Materials Needed
- Yarn: Approximately 800 (1000, 1200) yards of worsted weight (#4 Medium) cotton or cotton-blend yarn. The sample uses a soft, durable cotton yarn for excellent stitch definition and easy care. For a 36" x 48" throw, use 800 yds; for a 48" x 60" blanket, use 1000 yds; for a 60" x 72" afghan, use 1200 yds.
- Crochet Hook: Size H/8 (5.0 mm) or size needed to obtain gauge.
- Notions: Tapestry needle for weaving ends, scissors, stitch markers (optional).
Gauge
4" x 4" square = 14 stitches (sc, dc pattern) x 10 rows in pattern stitch. To make a gauge swatch: chain 18. Work rows 1-3 of the pattern stitch (see below) until you have a 4" square. Adjust hook size if necessary to achieve gauge.
Abbreviations (US Terms)
- ch – chain
- sc – single crochet
- dc – double crochet
- st(s) – stitch(es)
- sk – skip
- rep – repeat
- RS – right side
- WS – wrong side
- pm – place marker
- sl st – slip stitch
- YO – yarn over
Pattern Instructions
Pattern Stitch (worked in rows)
This blanket uses a simple, reversible texture called "Lemon Peel Stitch" – a combination of single crochet and double crochet worked into the same row. It creates a bumpy, squishy fabric that lies flat without curling.
Foundation Row (RS): Ch multiple of 2 + 1 (for gauge: ch 15). Sc in 2nd ch from hook. *Dc in next ch. Sc in next ch. Rep from * across to last ch. Dc in last ch. Turn.
Row 1 (WS): Ch 1 (does not count as st). Sc in first st (the dc from previous row). *Dc in next st (the sc). Sc in next st (the dc). Rep from * across to last st. Dc in last st. Turn.
Rep Row 1 for pattern. Each row always begins with a ch 1, then sc in first st, then alternates dc/sc across, ending with a dc in the last st.
Blanket Size Options
- Throw: 36" wide x 48" long
- Lapghan/Receiving: 30" x 40"
- Twin: 48" x 66"
- Full/Queen: 60" x 80"
Adjust your starting chain count to match desired width (see formula below).
Step 1: Determine Starting Chain
Your gauge is 14 sts per 4 inches, which means 3.5 sts per inch. Multiply your desired width in inches by 3.5. Round to the nearest odd number (because pattern uses multiple of 2 + 1). Example: For a 36" throw: 36 x 3.5 = 126 sts. Since 126 is even, add 1 = 127 ch.
Step 2: Foundation Chain
Chain your calculated number plus 1 (for turning). For the 36" throw: ch 128. (The extra chain is for the turning chain of the first sc.)
Step 3: Work Foundation Row
Foundation Row (RS): Sc in 2nd ch from hook. *Dc in next ch. Sc in next ch. Rep from * across to last ch. Dc in last ch. You should have the number of stitches equal to your desired width (127 sts for throw). Turn.
Step 4: Repeat Pattern Row
Row 1 (WS): Ch 1 (does not count as st). Sc in first st. *Dc in next st. Sc in next st. Rep from * across to last st. Dc in last st. Turn.
Rows 2 through end: Repeat Row 1 until your work measures your desired length (e.g., 48 inches for a throw). Remember to always sc into a dc and dc into a sc. If you lose count, look at the fabric: the "bumps" (dc stitches) should be directly above each other from row to row, creating vertical columns.
Step 5: Final Row and Border
When you reach the desired length, do not fasten off. You will work a simple border to neaten the edges.
Border (worked in rounds)
Round 1: Ch 1. Sc evenly around the entire blanket, working 3 sc in each corner. For the long sides: work 1 sc in the side of each row (the "bump" at the end of each row). For the short sides (top and bottom): work 1 sc in each stitch of the foundation row and final row. When you reach the starting corner, join with a sl st to the first sc. Fasten off, weave in ends.
Optional Border Detail: For a more polished look, work Round 2 in reverse sc (crab stitch). Ch 1, then work sc from left to right (instead of right to left) around the entire blanket. Join with sl st. Fasten off.
Finishing
Weaving Ends
Using a tapestry needle, weave all loose ends into the back of the work, following the direction of the stitches. Trim excess yarn close to the fabric. For cotton yarn, a small dab of clear fabric glue on the tail (optional) can prevent fraying after washing.
Blocking
This cotton blanket benefits from a gentle wet block to even out stitches and open up the fabric slightly.
- Fill a basin with cool water and a drop of mild soap (like wool wash or baby shampoo).
- Submerge the blanket and gently press to wet thoroughly. Do not wring or twist.
- Drain the water. Press the blanket against the side of the basin to remove excess water, then roll it in a clean towel to absorb more moisture.
- Lay the blanket flat on a blocking mat or clean towels. Gently stretch it to the desired dimensions, using a tape measure to check. Pin the edges if needed (especially corners) to keep them square.
- Allow to air dry completely (12-24 hours). Remove pins and enjoy.
Tips
- Count Your Stitches: Every few rows, count your stitches to make sure you haven't accidentally added or dropped any. The pattern is very rhythmic, but a missed dc/sc can cause the edges to slant. The stitch count should always equal your starting chain minus 1 (e.g., 127 sts for the 36" throw).
- Edge Control: The first and last stitches of each row (sc in first, dc in last) are crucial for straight edges. If your edges look loose, try working the first sc into the very first stitch (not the chain space) and tighten your tension on the last dc. If edges are too tight, use a slightly looser tension on the turning chain.
- Color Changes (optional): To add stripes, simply change colors at the end of a row. Fasten off the old color, leaving a 6" tail. Join the new color with a sl st in the first st, then ch 1 and continue the pattern. Weave in ends as you go or wait until the end. For a clean look, always change colors on a WS row (so the color join is slightly less visible on the RS).