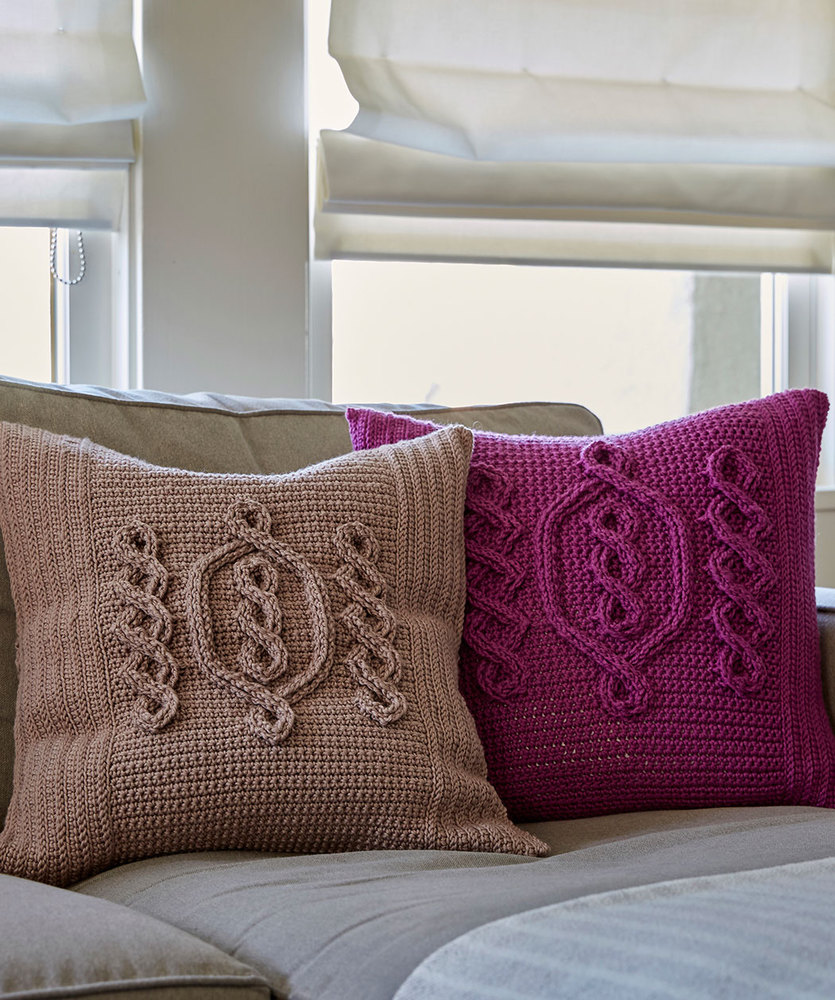
Free Crochet Pattern for a Chic Cable Pillow
Materials Needed
- Yarn: Approximately 650-750 yards of worsted weight (Category 4, Medium) cotton or cotton-acrylic blend yarn. A smooth, non-textured yarn is recommended for stitch definition. For the sample shown, we used Lily Sugar‘n Cream in “Jute” (2.5 oz/70g balls, approx. 6 balls) or a comparable brand.
- Crochet Hook: Size H/8 (5.0 mm) or size needed to obtain gauge.
- Notions: Yarn needle for weaving ends; scissors; stitch markers (optional, for counting repeats).
Gauge
4 inches (10 cm) square = 14 single crochet stitches (sc) x 16 rows, worked in back loop only (blo) pattern. Gauge is important for achieving the correct finished size. Make a swatch at least 5” x 5” and block it before measuring.
Abbreviations (US Terms)
- ch – chain
- sc – single crochet
- blo – back loop only
- st(s) – stitch(es)
- rep – repeat
- sk – skip
- sl st – slip stitch
- RS – right side
- WS – wrong side
Pattern Instructions
Finished Size: Approximately 24 inches wide x 36 inches long (61 cm x 91 cm), after blocking. This is a generous lapghan or a medium throw blanket.
Pattern Notes:
- This blanket is worked flat, back and forth in rows. The entire body is made using single crochet in the back loop only (blo), which creates a beautiful, dense, ridged texture that mimics woven fabric.
- The border is worked in a simple, flat single crochet edging to frame the piece.
- Chain 1 at the beginning of each row does not count as a stitch. Always work the first stitch of the row into the very first stitch (the same stitch where the turning chain comes from).
- To keep edges neat, work the turning chain loosely, or use a slightly larger hook for the turning chain only.
Body of the Blanket
Foundation Row (RS): Ch 84 loosely. Sc in 2nd ch from hook and in each ch across. Turn. (83 sc)
Row 1 (WS): Ch 1, sc in blo of first st, sc in blo of each st across. Turn. (83 sc)
Row 2 (RS): Ch 1, sc in blo of first st, sc in blo of each st across. Turn. (83 sc)
Rows 3 – 143: Repeat Row 1 and Row 2 alternately. Continue working in blo sc on every row until your piece measures approximately 34 inches (86 cm) from the foundation edge, or until you have worked a total of 143 rows from the beginning. End after completing a wrong-side row (Row 1 pattern). The blanket should be even and square on the sides.
Fasten off: Cut yarn, leaving a 6-inch tail. Pull through last loop and weave in ends.
Edging / Border
We will work a simple, clean single crochet border around the entire perimeter. This will stabilize the edges and give a finished look.
Round 1 (RS): With RS facing, join yarn with a sl st in any corner stitch on the top edge. Ch 1, work 2 sc in the same corner st. Then work sc evenly along the top edge, working 1 sc in each st across (83 sc). In the next corner, work 2 sc. Now work along the side edge: work 1 sc in the end of each row (143 rows = 143 sc). At the next corner, work 2 sc. Work across the bottom foundation edge: work 1 sc in each of the foundation ch sts (83 sc). At the next corner, work 2 sc. Work up the remaining side edge: work 1 sc in the end of each row (143 sc). At the starting corner, work 1 more sc to join with the first 2 sc (total 2 sc in that corner). Sl st into the first sc of the round. (Total sts: 4 corners with 2 sc each = 8 corner sts; 83+143+83+143 = 452 side sts; total = 460 sc)
Round 2: Ch 1, do not turn. Sc in the same st. Sc in each sc around, working 2 sc in each of the 4 corner sts from the previous round (the stitch that was the 2nd sc of the corner group). Sl st to join. Fasten off and weave in ends.
Note: If you prefer a wider border, repeat Round 2 one or two more times, always working 2 sc in the center corner stitch.
Finishing
- Weave in all ends: Using a yarn needle, carefully weave in the yarn tails from the start, from each color change (if any), and from the border join. Weave them into the back of the stitches for at least 2 inches, then trim close to the work.
- Blocking: This is an essential step for a professional finish. Fill a sink or basin with lukewarm water and a drop of mild soap (like wool wash or baby shampoo). Submerge the blanket completely and gently press (do not wring or twist) to saturate. Let it soak for 15-20 minutes. Drain the water, then gently press out excess moisture. Roll the blanket in a clean, dry towel to remove more water. Lay the blanket flat on a blocking mat or a clean, dry towel. Gently stretch and shape it to the finished dimensions (24” x 36”), ensuring corners are square and edges are straight. Use T-pins or blocking wires to hold it in place if needed. Allow to air dry completely (24-48 hours).
- Final check: Once dry, remove pins and give the blanket a light steam iron (on low heat, no direct contact) to further relax the stitches if desired.
Tips
- Maintain consistent tension: The back-loop-only stitch can pull the fabric inwards slightly. To prevent the blanket from curving or cupping, ensure your tension is relaxed and consistent. If you find your edges are tightening, use a hook one size larger for the turning chain only.
- Keep track of your rows: Because the pattern is repetitive, it’s easy to lose count. Use a row counter or place a stitch marker on the right side of your work to distinguish RS from WS rows. This helps with symmetry, especially when you add a border.
- Choose the right yarn: Cotton or a cotton-blend is ideal for this project because it has a crisp stitch definition and becomes softer with washing. Avoid overly stretchy or fuzzy yarns, as they will obscure the beautiful ridged texture of the blo single crochet.