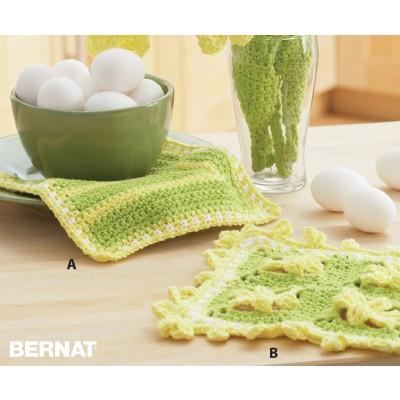
Daffodil Crochet Dishcloths Free EasyPattern
Materials Needed
- Yarn: Approximately 800 yards (730 meters) of worsted weight (Category 4) cotton or cotton-blend yarn. We recommend using a mercerized cotton for excellent stitch definition and durability. The sample uses 3 skeins (each 250 yards) of a light worsted cotton in a solid cream color.
- Crochet Hook: Size H/8 (5.0 mm) or size needed to obtain gauge.
- Notions: Yarn needle for weaving ends, scissors, stitch markers (optional), measuring tape.
Gauge
In the single crochet and chain stitch pattern used for the body (Pattern Stitch), approximately 16 sts x 14 rows = 4 inches (10 cm). For the border, gauge is not critical, but maintaining consistent tension is important for a flat finish.
Abbreviations (US Terms)
- ch – chain
- sc – single crochet
- dc – double crochet
- sl st – slip stitch
- st(s) – stitch(es)
- sp – space
- sk – skip
- rep – repeat
- RS – right side
- WS – wrong side
Pattern Instructions
Finished Size: Approximately 36 inches (91 cm) wide x 48 inches (122 cm) long, excluding the border. The border adds an additional 1.5 inches (4 cm) on each side.
Foundation
Ch 145 loosely. (If you want a different width, chain any multiple of 2 + 1. For example, for a 30-inch width, chain 121; for a 40-inch width, chain 161.)
Row 1 (Right Side):
Sc in the 2nd ch from hook and in each ch across. Turn. (144 sc)
Row 2:
Ch 1 (does not count as a st here and throughout), sc in first st. *Ch 1, sk next st, sc in next st; rep from * across. Turn. (72 sc, 72 ch-1 sps)
Row 3:
Ch 1, sc in first st. *Sc in the next ch-1 sp, sc in the next sc; rep from * across. Turn. (144 sc)
Note: Row 2 and Row 3 form the pattern. Row 2 creates an open, lacy row, and Row 3 fills it back in with solid fabric.
Repeat the Pattern:
Repeat Rows 2 and 3 until your piece measures approximately 47 inches (119 cm) from the foundation chain, ending with a Row 3 (a solid row). Do not fasten off. You will work the border directly onto the blanket.
Tip: To keep a straight edge, always insert your hook into the very first stitch of the row (not the turning chain space) when working the first sc of Row 2 and Row 3.
Border
The border is worked in joined rounds, starting from the corner. It uses a shell stitch to create a scalloped edge that lays flat.
Round 1: Foundation for Border
Do not turn your work. With the RS facing, ch 1. Work 3 sc in the corner where you just finished (this forms the first corner). Work sc evenly down the long side of the blanket. To do this, work 1 sc into the end of each solid row (Row 3) and 1 sc into the side of each lacy row (Row 2). The exact number of stitches isn't critical, but try to work roughly 2 sc for every 3 rows to prevent the border from ruffling or pulling. When you reach the next corner, work 3 sc in the corner. Repeat for the next two sides. When you return to the starting corner, work 2 more sc into the same corner (this completes the 3-sc corner you started with). Join with a sl st to the first sc of the round. Do not fasten off. (You will have a multiple of 2 + 1 stitches on each side, not counting the corner stitches).
Round 2: Shell Stitch Border
Ch 1 (does not count as a st). *In the next st (the center sc of a 3-sc corner), work (sc, ch 2, sc) to create a corner point. Then, along the side: **Sk next st, sc in next st, sk next st, work 5 dc in next st (this is a shell); rep from ** across the side, ending with a sc in the last st before the next corner. Rep from * for all four sides. Join with a sl st to the first sc. Fasten off and weave in ends.
Note: If your stitch count on the side is not a multiple of 3 (for the shell repeat), you can adjust the last repeat by adding an extra sc or skipping an extra stitch to make it work out neatly. The corner (sc, ch 2, sc) will hide any minor discrepancies.
Finishing
- Weave in Ends: Using your yarn needle, weave in all ends securely on the wrong side of the blanket. For the starting tail, weave it back through the foundation chain. For the finishing tail, weave it through the border stitches.
- Blocking: This step is crucial for a professional look, especially with cotton yarn. Fill a spray bottle with cool water and lightly mist the entire blanket until damp (do not soak). Lay the blanket flat on a clean towel or blocking mats. Gently stretch it to the finished dimensions (36” x 48” for the body, plus border). Pin the corners first to create sharp 90-degree angles. Then, pin the scalloped shells of the border to open them up and define the points. Allow the blanket to air dry completely, which may take 24-48 hours depending on humidity. Remove pins.
- Final Check: Once dry, gently flip the blanket over and press the seams of the border with your fingers to ensure they lay flat. Trim any stray yarn fibers.
Tips
- Maintain Consistent Tension: The alternating solid and lacy rows create a beautiful texture, but only if your tension is even. If you are a tight crocheter, consider going up a hook size (to 5.5 mm) for the foundation chain only, to prevent the bottom edge from being too tight. Practice on a small swatch to find your rhythm before starting the full blanket.
- Count Your Stitches: After every 10 rows, quickly count your stitches across a row to ensure you haven’t accidentally added or skipped a stitch. A dropped chain-1 space in Row 2 will cause a visible gap in the pattern. Catching this early saves time.
- Customize the Border: If you prefer a simpler finish, you can replace the shell stitch border (Round 2) with a round of single crochet (work 1 sc in each st and 3 sc in each corner), followed by a round of reverse single crochet (crab stitch) for a neat, corded edge. Simply work 1 sc in each st around, with 3 sc in each corner, then work reverse sc in each st of that round.