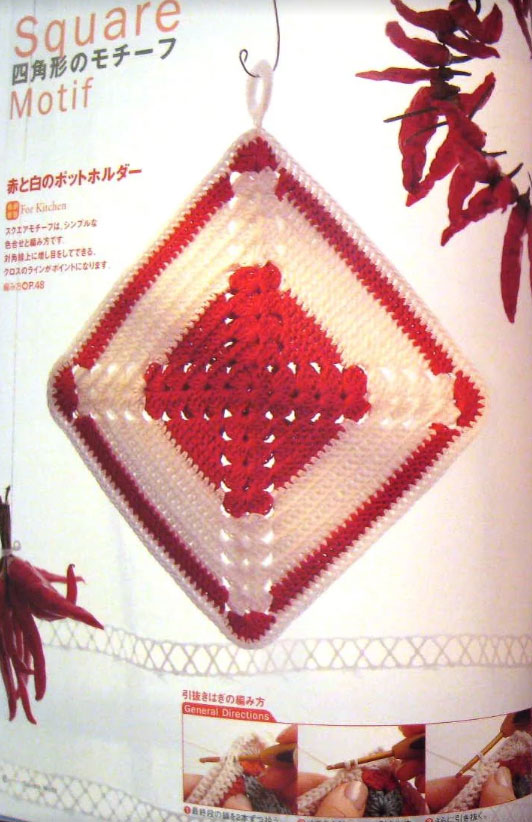
Crochet Square Motif Dishcloth Pattern
Materials Needed
Yarn: Worsted weight (#4 Medium) cotton or cotton-blend yarn. This project is designed for a durable, absorbent, and machine-washable fabric. We recommend a smooth, non-splitting yarn for clear stitch definition.
- Main Color (MC): 2 skeins (approx. 220 yards / 200 meters total) – for the main body of the dishcloth.
- Contrast Color A (CA): 1 skein (approx. 30 yards / 27 meters) – for the border or accent stripes.
- Contrast Color B (CB): Small amount (approx. 15 yards / 14 meters) – for a final decorative edging.
Hook: Size H/8 (5.0 mm) or size needed to obtain gauge. A slightly larger hook than recommended for worsted weight helps create a soft, drapey fabric that is not too stiff for a dishcloth.
Notions:
- Tapestry needle (for weaving in ends)
- Scissors
- Stitch marker (optional, for tracking rounds)
Gauge
Gauge in pattern stitch (after blocking): 4 inches (10 cm) = 16 stitches x 12 rows of half double crochet (hdc) worked in the back loop only (blo).
To check gauge: Chain 18. Work in hdc blo for 14 rows. Your swatch should measure approximately 4.5 inches wide by 4.5 inches tall. Adjust hook size if necessary. Accurate gauge ensures the finished size and fabric density.
Abbreviations (US Terms)
- ch – chain
- sl st – slip stitch
- sc – single crochet
- hdc – half double crochet
- dc – double crochet
- blo – back loop only (work into the back loop of the stitch)
- flo – front loop only (work into the front loop of the stitch)
- rep – repeat
- st(s) – stitch(es)
- sk – skip
- sp – space
- RS – right side
- WS – wrong side
- MC – Main Color
- CA – Contrast Color A
- CB – Contrast Color B
Pattern Instructions
Important Note: This dishcloth is worked flat in rows, then a seamless border is added in the round around the entire piece. The main fabric uses a simple, textured stitch: the half double crochet worked in the back loop only (hdc blo). This creates a lovely ridged, waffle-like texture that is highly absorbent and scrubs well.
Main Body (Worked flat with MC)
Foundation Row: With MC, ch 37. (This gives a width of about 9 inches.)
Row 1 (RS): Hdc in the 3rd ch from the hook (the first 2 skipped chs count as the first hdc). Hdc in each ch across. Turn. (36 hdc total, including the turning ch.)
Row 2 (WS): Ch 2 (counts as first hdc). *Hdc blo in the next st.* Rep from * across to the last st. Hdc in the top of the turning ch from the previous row. Turn. (36 sts: 35 hdc blo + 1 hdc in the turning ch.)
Row 3 (RS): Ch 2 (counts as first hdc). *Hdc blo in the next st.* Rep from * across to the last st. Hdc in the top of the turning ch. Turn. (36 sts.)
Repeat Row 2 and Row 3 until the piece measures approximately 9 inches (23 cm) from the foundation chain, ending after a WS row. You will have worked a total of about 27 rows. Do not fasten off. You will continue directly into the border.
Border (Worked in the round with CA and CB)
Round 1 (RS, Border Base – CA): Do not turn your work. Ch 1. Now you will work a single crochet border evenly around the entire perimeter of the square.
- Top Edge: Sc in each hdc across the top of the last row. (36 sc)
- First Side: Ch 1 (this is a corner turn). Now work 1 sc into the side of each row (the post of the hdc at the edge). You will have approximately 30 sc down the side (one sc per row, but you may need to adjust slightly to keep the fabric flat).
- Bottom Edge: Ch 1 (corner). Now work 1 sc into the back loop of each foundation chain across the bottom. (36 sc)
- Second Side: Ch 1 (corner). Work 1 sc into the side of each row up the other side. (30 sc)
- Joining: Ch 1 (corner). Join with a sl st to the first sc of the round. You now have a square with 4 corners. Fasten off CA.
Round 2 (Crab Stitch Edging – CB): This round creates a beautiful, braided-looking edge. It is also called "reverse single crochet."
Attach CB with a sl st to the first sc of Round 1 (at any corner, but preferably at a corner where you will start moving right-to-left). Do not ch 1.
- *Crab Stitch: Insert hook from front to back into the next stitch to the right (i.e., the stitch you just finished, moving backwards). Yarn over, pull up a loop (you will have 2 loops on hook). Yarn over, pull through both loops. One crab stitch made. *
- Rep from * to * around the entire perimeter. When you reach a corner, simply work 1 crab stitch into the corner ch-1 space as if it were a stitch. This will naturally create a slightly rounded corner.
- When you have worked all the way around, join with a sl st to the first crab stitch. Fasten off CB, leaving a 6-inch tail for weaving.
Finishing
Weaving in Ends: Using your tapestry needle, carefully weave all ends (from MC, CA, and CB) into the back of the fabric. Weave them in a zig-zag pattern over several stitches to secure them. Trim any excess yarn close to the fabric.
Blocking (Optional but Recommended): Blocking will even out your stitches, set the textured ridges, and ensure the dishcloth is perfectly square and flat.
- Wet Blocking: Soak the finished dishcloth in cool water with a drop of mild soap for 15 minutes. Rinse thoroughly. Gently squeeze out excess water (do not wring).
- Pinning: Lay the dishcloth flat on a blocking mat or a dry towel. Gently stretch it to the desired 9 x 9 inch (23 x 23 cm) square shape. Use rust-proof pins to secure the corners and edges.
- Drying: Allow it to dry completely (usually 24 hours). The cotton will hold the shape beautifully.
Final Check: Once dry, trim any remaining tiny yarn ends. Your dishcloth is now ready for use!
Tips
- Keep Consistent Tension: The key to the beautiful ridged texture of the hdc blo stitch is consistent tension. Try not to pull your yarn too tightly, especially on the turning chains. A slightly looser tension will make the fabric more absorbent and drapable. If your edges start to curl, you are likely working the turning chain too tight.
- Master the Crab Stitch: The crab stitch (reverse single crochet) can feel awkward at first because you are working backwards. Practice on a small swatch. The key is to keep your tension even—don't pull the loops too tight, or the edge will pucker. Work slowly and steadily. The result is a gorgeous, sturdy, non-rolling edge that looks professional.
- Customize Your Size: This pattern is easily customizable. For a larger dishcloth or a small blanket, simply chain a longer foundation row (any multiple of 1, plus 2 for the turning chain) and work more rows. Remember to adjust your yarn amounts accordingly. For a matching set, make a few in different colors!