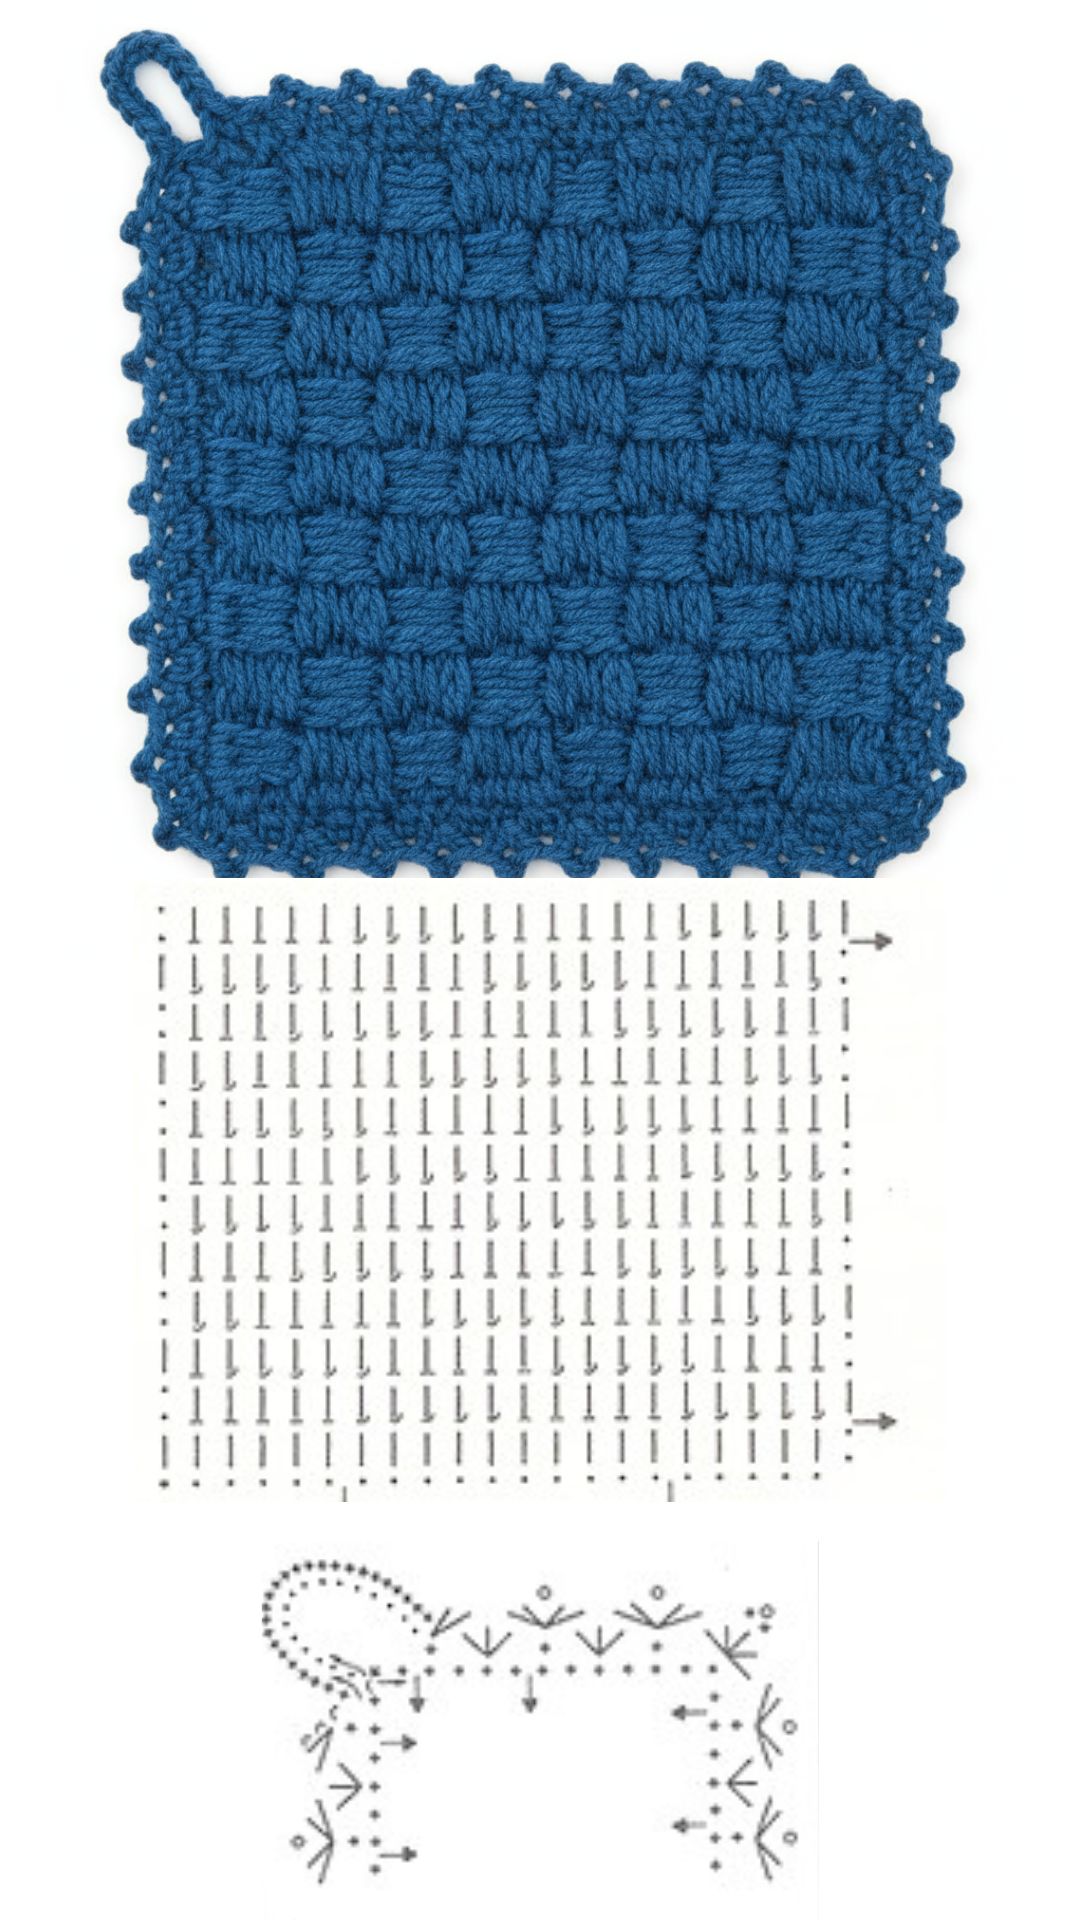
Crochet Dishcloth Free Pattern
Materials Needed
- Yarn: Approximately 800-900 yards (732-823 meters) of worsted weight (Category 4) cotton yarn. Cotton is recommended for its durability, absorbency, and stitch definition. I used Lily Sugar‘n Cream in “Ecru” (approx. 5 balls/2.5 oz each).
- Crochet Hook: Size H/8 (5.0 mm), or size needed to obtain gauge.
- Notions: Yarn needle for weaving ends, scissors, stitch markers (optional, for counting).
Finished Size
Approximately 24 inches (61 cm) wide by 36 inches (91 cm) long, including border. This makes a generous lap blanket or a large decorative throw pillow cover (if seamed).
Gauge
In pattern stitch: 14 stitches and 10 rows = 4 inches (10 cm) square, measured after blocking.
Important: Gauge is critical for achieving the correct finished size. If your gauge is off, adjust your hook size accordingly.
Abbreviations (US Terms)
- ch – chain
- sc – single crochet
- dc – double crochet
- tr – treble crochet
- st(s) – stitch(es)
- sk – skip
- sp – space
- RS – right side
- WS – wrong side
- rep – repeat
- sl st – slip stitch
- yo – yarn over
- pm – place marker
Pattern Instructions
Special Stitches
- V-Stitch (V-st): (dc, ch 1, dc) all in the same stitch or space.
- Shell Stitch (Shell): (2 dc, ch 1, 2 dc) all in the same stitch or space.
- Picot: ch 3, sl st in the top of the last stitch worked (or in the 3rd ch from hook).
Blanket Body (Worked Flat in Rows)
Foundation Row: Ch 113 (multiple of 6 + 5 for this pattern). Sc in 2nd ch from hook and in each ch across. (112 sc) Turn.
Row 1 (RS): Ch 4 (counts as dc + ch 1). Sk first sc, *V-st in next sc, sk 2 sc, Shell in next sc, sk 2 sc; rep from * across to last 3 sc. V-st in next sc, sk 1 sc, dc in last sc. Turn. (You will have 18 V-sts and 18 Shells, plus the starting and ending dc).
Row 2 (WS): Ch 1. Sc in first dc (the turning chain from previous row). *Ch 1, sc in ch-1 sp of next V-st, ch 1, sc in ch-1 sp of next Shell; rep from * across. End with sc in 3rd ch of turning ch-4. Turn.
Row 3: Ch 4 (counts as dc + ch 1). Sk first sc. *Shell in next sc (the sc from the V-st on previous row), sk 2 ch-1 sps, V-st in next sc (the sc from the Shell); rep from * across. End with dc in last sc. Turn. (This row alternates the placement of Shells and V-sts.)
Row 4: Repeat Row 2.
Row 5: Repeat Row 1. (This returns the pattern to the starting alignment.)
Rows 6-80: Repeat Rows 2-5. Continue until your piece measures approximately 32 inches from the foundation edge, ending after a Row 2 or Row 4 (a wrong-side row). Do not fasten off.
Final Row (WS): Ch 1. Sc in each sc and in each ch-1 sp across. (112 sc) Fasten off and weave in this yarn end.
Edging / Border
Note: The border is worked in continuous rounds. Use a stitch marker to keep track of the round start.
Round 1 (RS): Attach yarn with a sl st to any corner of the blanket. Ch 1. Work sc evenly around the entire perimeter, placing 3 sc in each corner to turn the corner. For the top and bottom edges, work 1 sc in each sc across (112 sc). For the side edges, work 1 sc in each row-end (approx. 80 sc per side, adjusting as needed to keep the edge flat). Join with sl st to first sc. Do not turn.
Round 2: Ch 1. Sc in same st. *Ch 3, sk 2 sc, sc in next sc; rep from * around, working (sc, ch 3, sc) in each corner sc to maintain the corner shape. Join with sl st to first sc.
Round 3: Sl st into the ch-3 sp. Ch 1. *(Sc, ch 3, sc) in the ch-3 sp; rep from * around. In each corner ch-3 sp, work (sc, ch 3, sc, ch 3, sc) to create a stronger corner. Join with sl st to first sc.
Round 4 (Picot Edge): Ch 1. Sc in same st. *Sk next ch-3 sp, sc in next sc, ch 3 (picot), sl st into the top of the sc just made (forming a small loop), sc in next sc; rep from * around, adjusting corners as needed to keep the work flat. Join with sl st to first sc. Fasten off.
Finishing
- Weave in Ends: Using a yarn needle, weave in all yarn tails securely on the wrong side of the blanket. Trim any excess yarn.
- Blocking (Highly Recommended): Soak the blanket in cool water with a splash of mild soap (like Eucalan or baby shampoo) for 15-20 minutes. Gently squeeze out excess water (do not wring). Lay the blanket flat on a clean towel, roll it up to remove more moisture, then unroll and lay it flat on a blocking mat or another dry towel. Gently stretch the piece to the finished measurements (24” x 36”), pinning the corners and edges if needed. Allow to air dry completely. Blocking evens out the stitches, defines the lace pattern, and softens the cotton.
- Optional – Pillow Cover: If you wish to make this into a pillow, fold the finished and blocked blanket in half (right sides together) so it measures 24” x 18”. Sew the two long sides and one short side using a whip stitch or mattress stitch. Turn right side out, insert a 24” x 18” pillow form, and sew the final side closed with an invisible stitch.
Tips
- Count Your Stitches: The V-st and Shell pattern relies on a consistent number of stitches per row. After the first few rows, count your total stitches (112 sc per row on the body rows). If you find you have extra or missing stitches, check that you are correctly skipping 2 stitches between each V-st/Shell cluster.
- Yarn Selection Matters: Cotton has no memory, so it drapes beautifully and holds its shape well for home decor. Avoid acrylic yarn for a blanket meant for heavy use or washing, as it may pill. If you substitute yarn, make sure you check gauge and washability.
- Border Adjustments: If your border starts to ruffle or pull, adjust the number of sc you work into the sides (Round 1). For a flatter border, work 1 sc into every other row-end. For a fuller border, work 1 sc into every row-end. The picot edging (Round 4) can be skipped if you prefer a simple scalloped edge—just end after Round 3.