Big Crochet Heart Pattern for Valentine’s Day
Materials Needed
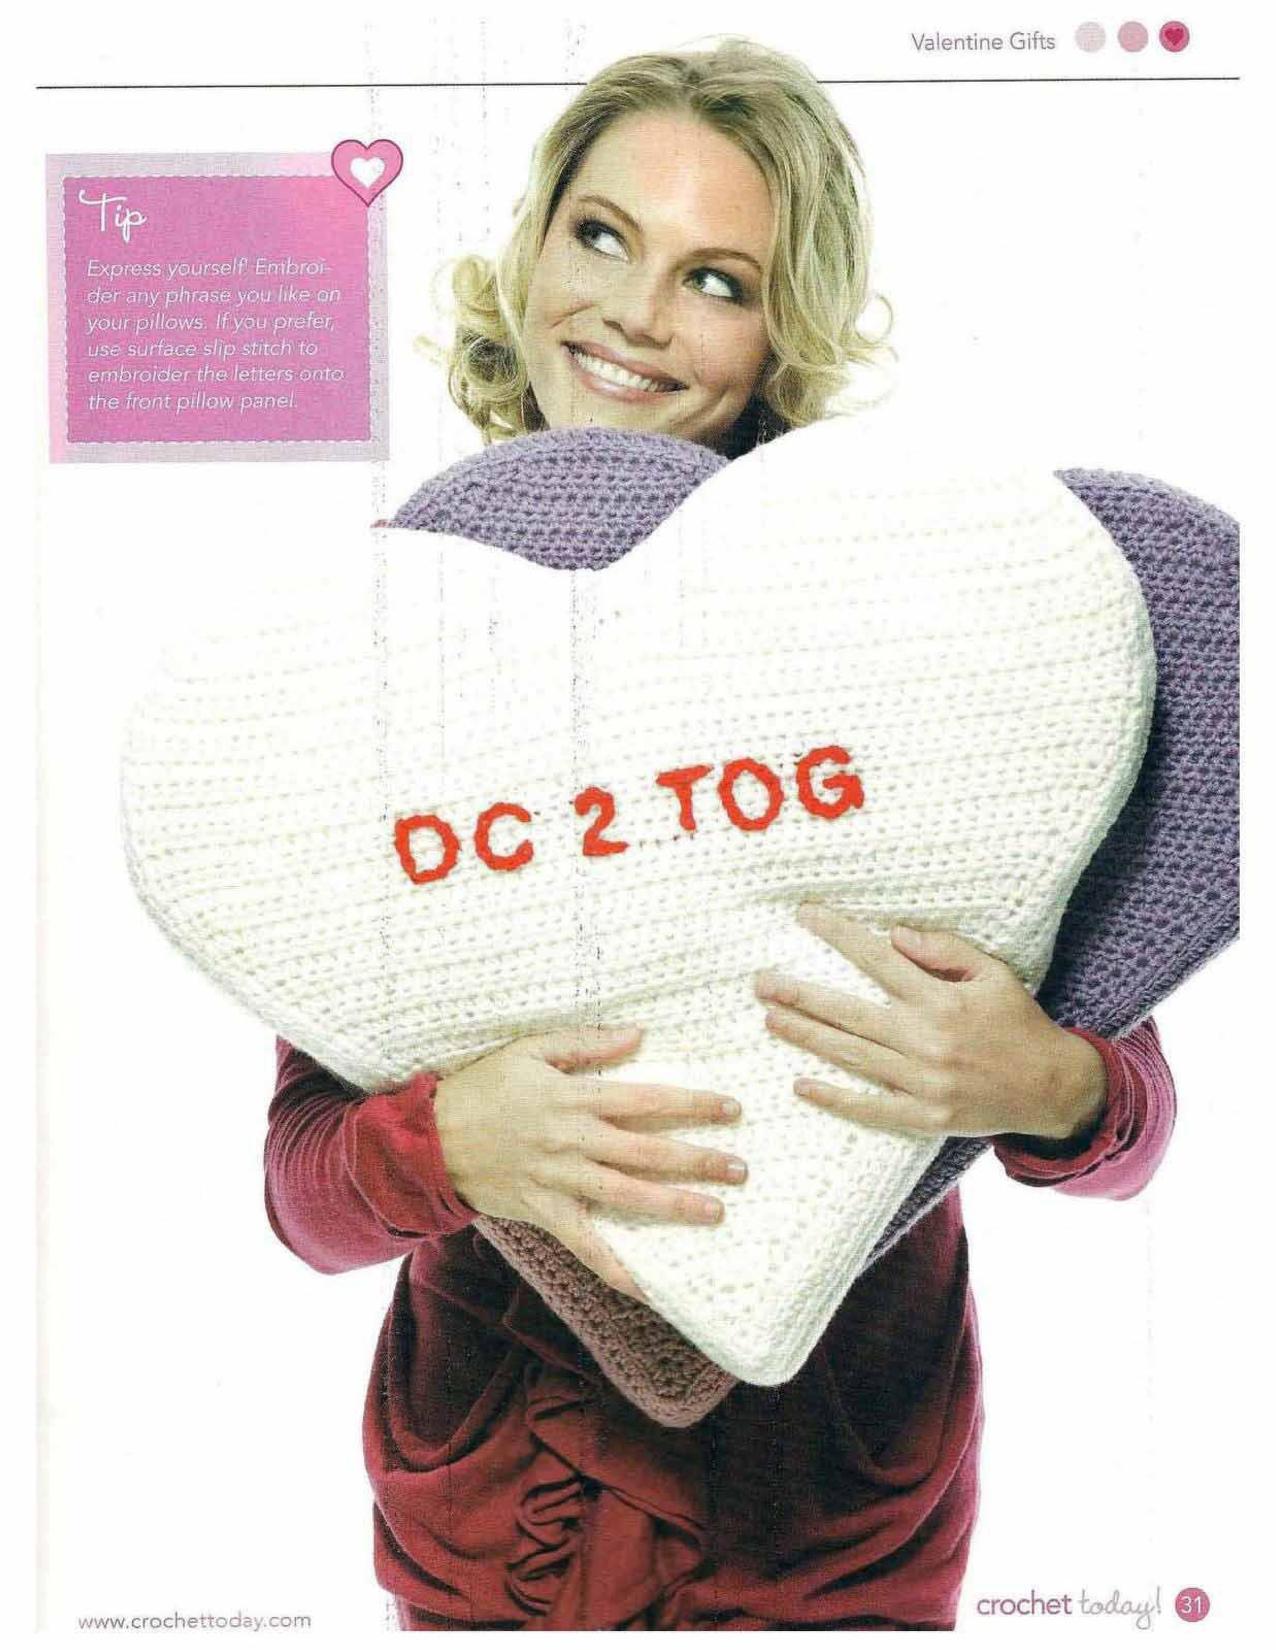
Yarn: Super Bulky weight (Category 6) yarn. For a large pillow (approx. 18 inches wide x 16 inches tall), you will need approximately 400-500 yards of super bulky yarn. Suggested: 2 skeins (250 yards each) of a plush chenille or chunky acrylic, such as Bernat Blanket Yarn or Lion Brand Hometown USA. For a smaller decorative pillow (approx. 12 inches wide x 10 inches tall), use 250-300 yards of super bulky yarn.
Crochet Hook: Size N/P (10.0 mm) or size needed to match gauge. For a denser fabric, you may use a size M (9.0 mm).
Notions: Tapestry needle for weaving ends, stitch markers (4), scissors, polyester fiberfill or pillow insert (one 18-inch square or 16-inch round for large size, or a 12-inch square for small size). Optional: Fabric glue for extra security on ends.
Gauge
Gauge in pattern stitch (double crochet): 10 sts x 6 rows = 4 inches (10 cm) using N/P (10.0 mm) hook. Gauge is critical for achieving the correct finished size. Always make a gauge swatch before starting.
Finished Size (Large): Approximately 18 inches (46 cm) wide at the widest point, 16 inches (41 cm) tall from bottom point to top center dip.
Finished Size (Small): Approximately 12 inches (30 cm) wide, 10 inches (25 cm) tall.
Abbreviations (US Terms)
- ch – chain
- sl st – slip stitch
- sc – single crochet
- dc – double crochet
- hdc – half double crochet
- st(s) – stitch(es)
- rep – repeat
- sk – skip
- sp – space
- RS – right side
- WS – wrong side
- inc – increase (work 2 dc in same st)
- dec – decrease (dc2tog: yarn over, insert hook in next st, pull up loop, yarn over, pull through 2 loops, yarn over, insert hook in next st, pull up loop, yarn over, pull through 2 loops, yarn over, pull through all 3 loops)
- dc2tog – double crochet 2 together (as described above)
- F/O – fasten off
Pattern Instructions
Note: The heart is worked in two pieces (two lobes) that are joined at the top center, then worked downward to form the point. The pillow is made from two identical heart-shaped panels (front and back), which are then seamed together and stuffed. If you prefer a seamless look, you can work the front panel as described, then work a second identical panel for the back.
Panel 1 (Front) – First Lobe (Right Lobe)
Worked from the top of the lobe downward to the center.
- Row 1: Ch 2. Work 3 dc in the 2nd ch from hook. Turn. (3 sts)
- Row 2: Ch 2 (counts as dc here and throughout), dc in same st (inc), dc in next st, 2 dc in last st (inc). Turn. (5 sts)
- Row 3: Ch 2, dc in same st (inc), dc in next 3 sts, 2 dc in last st (inc). Turn. (7 sts)
- Row 4: Ch 2, dc in same st (inc), dc in next 5 sts, 2 dc in last st (inc). Turn. (9 sts)
- Row 5: Ch 2, dc in same st (inc), dc in next 7 sts, 2 dc in last st (inc). Turn. (11 sts)
- Row 6: Ch 2, dc in same st (inc), dc in next 9 sts, 2 dc in last st (inc). Turn. (13 sts)
- Row 7: Ch 2, dc in same st (inc), dc in next 11 sts, 2 dc in last st (inc). Turn. (15 sts)
- Row 8: Ch 2, dc in same st (inc), dc in next 13 sts, 2 dc in last st (inc). Turn. (17 sts)
- Row 9: Ch 2, dc in same st (inc), dc in next 15 sts, 2 dc in last st (inc). Turn. (19 sts)
- Row 10: Ch 2, dc in same st (inc), dc in next 17 sts, 2 dc in last st (inc). Turn. (21 sts)
Shape the top curve of the lobe:
- Row 11: Ch 2, dc in same st (inc), dc in next 19 sts, 2 dc in last st (inc). Turn. (23 sts)
- Row 12: Ch 1, hdc in first st, sc in next 2 sts, sl st in next 2 sts, sc in next 2 sts, hdc in next 2 sts, dc in remaining sts until last 7 sts, hdc in next 2 sts, sc in next 2 sts, sl st in next 2 sts, sc in last st, hdc in last st. Turn. (23 sts – this row rounds the top of the lobe). Note: The center dip of the heart will be formed later.
- Row 13 (decrease row for inner edge): Ch 2, dc2tog (first decrease), dc in next 19 sts, dc2tog (last decrease). Turn. (21 sts)
- Row 14: Ch 2, dc2tog, dc in next 17 sts, dc2tog. Turn. (19 sts)
- Row 15: Ch 2, dc2tog, dc in next 15 sts, dc2tog. Turn. (17 sts)
- Row 16: Ch 2, dc2tog, dc in next 13 sts, dc2tog. Turn. (15 sts)
- Row 17: Ch 2, dc2tog, dc in next 11 sts, dc2tog. Turn. (13 sts)
- Row 18: Ch 2, dc2tog, dc in next 9 sts, dc2tog. Turn. (11 sts)
- Row 19: Ch 2, dc2tog, dc in next 7 sts, dc2tog. Turn. (9 sts)
- Row 20: Ch 2, dc2tog, dc in next 5 sts, dc2tog. Turn. (7 sts)
- Row 21: Ch 2, dc2tog, dc in next 3 sts, dc2tog. Turn. (5 sts)
- Row 22: Ch 2, dc2tog, dc in next 1 st, dc2tog. Turn. (3 sts)
- Row 23: Ch 2, dc2tog over next 2 sts. (1 st remains). F/O, leaving a long tail (18 inches) for seaming. Set aside.
Panel 1 – Second Lobe (Left Lobe)
Repeat Rows 1-23 exactly as for the Right Lobe, but do not fasten off after Row 23. Instead, you will join the two lobes.
Joining the Lobes
- Joining Row (RS): With the Left Lobe still attached (last st on hook), ch 1. Insert hook into the first st of the Right Lobe (the top of the lobe where you fastened off). Sl st to join the two lobes at the top center. Do not turn. The two lobes are now connected at the top. The bottom edges of both lobes are now facing downward.
- Set-up Row for Body: Ch 2 (counts as dc). Work 1 dc in the same st (the joining sl st). Then work 1 dc in each of the next 22 sts across the bottom of the Right Lobe (the last row of the Right Lobe has 23 sts total, but you already used 1 for joining, so 22 remain). Then work 1 dc in each of the 23 sts across the bottom of the Left Lobe. You will have a total of 46 sts (23 from each lobe). Turn. (46 sts)
Heart Body (Downward to Point)
Now you will work the decreasing point of the heart.
- Row 1: Ch 2, dc in each st across. Turn. (46 sts)
- Row 2: Ch 2, dc in next 20 sts, dc2tog (center decrease), dc in next 20 sts, dc2tog (last st). Turn. (44 sts)
- Row 3: Ch 2, dc in next 19 sts, dc2tog, dc in next 19 sts, dc2tog. Turn. (42 sts)
- Row 4: Ch 2, dc in next 18 sts, dc2tog, dc in next 18 sts, dc2tog. Turn. (40 sts)
- Row 5: Ch 2, dc in next 17 sts, dc2tog, dc in next 17 sts, dc2tog. Turn. (38 sts)
- Row 6: Ch 2, dc in next 16 sts, dc2tog, dc in next 16 sts, dc2tog. Turn. (36 sts)
- Row 7: Ch 2, dc in next 15 sts, dc2tog, dc in next 15 sts, dc2tog. Turn. (34 sts)
- Row 8: Ch 2, dc in next 14 sts, dc2tog, dc in next 14 sts, dc2tog. Turn. (32 sts)
- Row 9: Ch 2, dc in next 13 sts, dc2tog, dc in next 13 sts, dc2tog. Turn. (30 sts)
- Row 10: Ch 2, dc in next 12 sts, dc2tog, dc in next 12 sts, dc2tog. Turn. (28 sts)
- Row 11: Ch 2, dc in next 11 sts, dc2tog, dc in next 11 sts, dc2tog. Turn. (26 sts)
- Row 12: Ch 2, dc in next 10 sts, dc2tog, dc in next 10 sts, dc2tog. Turn. (24 sts)
- Row 13: Ch 2, dc in next 9 sts, dc2tog, dc in next 9 sts, dc2tog. Turn. (22 sts)
- Row 14: Ch 2, dc in next 8 sts, dc2tog, dc in next 8 sts, dc2tog. Turn. (20 sts)
- Row 15: Ch 2, dc in next 7 sts, dc2tog, dc in next 7 sts, dc2tog. Turn. (18 sts)
- Row 16: Ch 2, dc in next 6 sts, dc2tog, dc in next 6 sts, dc2tog. Turn. (16 sts)
- Row 17: Ch 2, dc in next 5 sts, dc2tog, dc in next 5 sts, dc2tog. Turn. (14 sts)
- Row 18: Ch 2, dc in next 4 sts, dc2tog, dc in next 4 sts, dc2tog. Turn. (12 sts)
- Row 19: Ch 2, dc in next 3 sts, dc2tog, dc in next 3 sts, dc2tog. Turn. (10 sts)
- Row 20: Ch 2, dc in next 2 sts, dc2tog, dc in next 2 sts, dc2tog. Turn. (8 sts)
- Row 21: Ch 2, dc in next 1 st, dc2tog, dc in next 1 st, dc2tog. Turn. (6 sts)
- Row 22: Ch 2, dc2tog, dc in next 2 sts, dc2tog. Turn. (4 sts)
- Row 23: Ch 2, dc2tog twice. Turn. (2 sts)
- Row 24: Ch 2, dc2tog over the last 2 sts. (1 st remains). F/O, leaving a long tail (18 inches) for seaming.
Panel 1 is complete. Weave in all ends except the long tails.
Panel 2 (Back)
Repeat the entire pattern (First Lobe, Second Lobe, Joining, and Heart Body) to create a second identical panel. Weave in ends, leaving long tails at the top center and bottom point for seaming.
Finishing
Assembly: Place Panel 1 and Panel 2 with wrong sides together (right sides facing outward). Use the long tails from the top center and bottom point to help align the pieces. Pin or use stitch markers around the entire perimeter to hold the panels together, leaving a 6-inch opening along one side (or at the bottom point) for turning and stuffing.
Seaming: Using a tapestry needle and a long strand of yarn (or the remaining tails), whip stitch the two panels together. Use a matching yarn color and work through both loops of each stitch along the edges. Stitch securely, maintaining even tension. When you reach the opening, stop and remove pins.
Stuffing: Turn the pillow right side out through the opening. Using polyester fiberfill, stuff the pillow firmly but evenly. Start by filling the two top lobes, then the bottom point. Use the blunt end of a crochet hook or a chopstick to push the stuffing into the corners. For a more uniform shape, you can use a 16-inch or 18-inch pillow form instead of loose fiberfill; simply insert it through the opening.
Closing: Once stuffed, whip stitch the opening closed. Weave in the yarn end securely and trim any excess.
Blocking (optional): If desired, lightly steam block the pillow to even out stitches and sharpen the heart shape. Do not press heavily on the yarn; hold the iron/steamer a few inches away. Allow to dry completely before using.
Tips
- Maintain consistent tension on the decreases: The heart’s point is shaped by central decreases (dc2tog). To avoid a lopsided point, always work the decrease exactly in the center of the row (e.g., after 20 sts, then dc2tog, then 20 sts). Use stitch markers to mark the center two stitches if needed.
- Choose the right yarn for the pillow’s structure: Super bulky chenille or chunky acrylic gives a soft, plush feel, but it can be stretchy. If you want a stiffer, more structured heart pillow, use a worsted weight yarn held double or a bulky cotton blend. Adjust your hook size accordingly to achieve the gauge.
- Make it a no-sew version: If you